Chicken Flautas

I find it interesting the so called shortcuts people like to take when cooking. How so much processed food seems to be the go to when they don’t really save time or money. In fact, it’s more expensive for the most part. When I was doing my pinning on Pinterest I came across a recipe for Chicken Flautas that called for canned chicken that came already seasoned. I wouldn’t want to even guess what preservatives and junk would also be in that can. No way, thank you.

I mean, how hard is it to mix a few ingredients together and slow cook chicken? Not very hard! While I cooked the chicken in the oven, you can use a slow cooker and walk away.

Our garden is doing so much better than last year so this is dish was a great way to use what is just outside our door. I was able to use tomatoes, hot peppers and sweet peppers for this meal.

Technique for Chicken Flautas

Pre heat the oven to 300F/150C.

Mix the marinade ingredients and make sure the chicken is coated. I cooked twice as much chicken so I could use some for salads and lunches.

Slow cook for 3-4 hours, until the chicken is tender and shreds easily. Using two forks, tear the chicken apart.

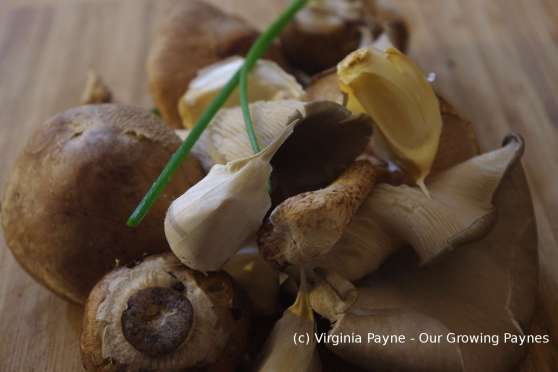
Set aside. Heat up the olive oil in a skillet. Sauté the onions, mushrooms and garlic until the onions begin to soften. Add the peppers and cook for a couple of minutes. Add the chicken, seasonings, lime juice and chicken stock. Stir well and simmer. You want to reduce the liquid so the mixtures stays moist but isn’t overly liquid.

Heat up the vegetable oil in a saucepan to about 335F/170C.

Place the filling on flour tortillas. I accidentally bought quinoa flour gluten free tortillas. I was a bit worried that this would end up a failure. Thankfully they fried up well. Roll the tortillas tightly and spear with a toothpick. Fry until they are golden brown and crispy. Drain and place on a piece of kitchen roll to absorb the extra oil.

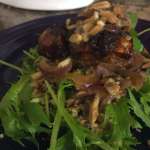
In an attempt to keep this somewhat healthy, I served it over a bed of lettuce. I chopped up a fresh tomato, a spring onion and cilantro to top along with queso fresco. You can also serve with dollops of sour cream or guacamole.

Chicken Flautas

Slow cooked chicken, seasoned with hot peppers, then wrapped in deep fried goodness.

Course Main Course
Cuisine Mexican
Keyword Chicken Flautas
Prep Time 10 minutes
Cook Time 3 hours 30 minutes
Servings 4
Author Our Growing Paynes

Ingredients

Shredded Chicken

  • 1 lb boneless chicken breast
  • 2 tbsp olive oil
  • 2 tbsp lime juice
  • 2 tsp chili powder
  • 1 tsp ground cumin
  • 1/2 tsp sea salt
  • 1/2 tsp freshly ground black pepper
  • 1/2 cup chicken stock

Chicken Flautas filling

  • 2 tbsp olive oil
  • 1 cup finely chopped onion
  • 1 mushroom, finely chopped
  • 2-3 cloves of garlic, finely chopped
  • 1 hot pepper, chopped
  • 1 cup sweet pepper, finely chopped
  • 2 cups shredded chicken
  • 1 tbsp chili powder
  • 1 tsp ground cumin
  • 2 tsp fresh cilantro (coriander leaf)
  • 2 tbsp lime juice
  • 1/2 cup chicken stock

Tomato and Spring Onion

  • 1 tomato, coarsly chopped
  • 1 small spring onion, chopped
  • dash lime juice
  • sea salt to taste

Completing Chicken Flautas

  • 1/2 deep sauce pan of vegetable oil
  • 12 half 8" flour tortillas
  • 1 cup crumbled queso fresco

Instructions

Shredded chicken

  1. Preheat the oven to 300F/150C.

  2. Mix the ingredients together in a baking dish and add the chicken. Make sure the chicken is nearly covered and coated. Bake for 3-4 hours until the chicken is fork tender. Use two forks to shred the chicken. Set aside.

Chicken Flautas filling

  1. Heat the olive oil in a skillet. Sautè the onions, garlic and mushrooms until the onions start becoming soft. Add the peppers and the chicken. Mix in the seasonings, lime juice and chicken stock. Simmer until the liquid is nearly reduced to zero. You want the mixture moist but not overly wet.

Tomato and Spring Onion

  1. Add the ingredients together in a small bowl and set aside.

Completing the Chicken Flautas

  1. Spoon a couple of tablespoons of filling onto each half tortilla. Roll tightly and secure with a toothpick. Heat the vegetable oil to 335F/ 170C. Deep fry the flautas until golden and crispy. Drain and place on kitchen roll to absorb excess oil.

  2. Place the flautas on a bed of lettuce, top with the tomato and spring onion along with the cheese. Serve immediately.

Cream of Mushroom Soup

Quick as a flash we are firmly in soup weather.  Last night we had a frost and surrounding towns had a dusting of snow.  I am so not ready for winter but Mother Nature doesn’t want to listen to me.  She doesn’t want to listen to the pepper plants either.  I will be pickling and preserving as much as I can this week so they won’t go to waste.  My Hot Pepper Jelly is first up.

At the end of my in-laws visit we did a tapas night and I planned way too many dishes, enough for an army, so there were many mushrooms leftover and I needed to use.  I thought cream of mushroom soup would fit the hearty bill for the cold weather.  This is so incredibly easy to make and the flavours are so good!  Perfect to have in your dinner “toolbox” when life gets crazy.

Technique for Cream of Mushroom Soup:

Prep all your ingredients before cooking.  Slice the mushrooms so that they are somewhat chunky.

In a saucepan, melt the butter and begin to brown the mushrooms.  Do this for several minutes, the longer you do it the more flavour you will get.  Once they start to brown add the onion.  Allow them to become translucent.  Then add the garlic and fresh thyme.

Cook for a couple of minutes.  If the mushrooms have sucked up too much butter add a bit more to make a roux with the flour.  Add the flour and cook for another couple of minutes.

Slowly add the beer as it can get really fizzy.

Add the veg bouillon and bring to a simmer.  Season with sea salt and pepper.  Simmer until just before dinner.

Add the cream and serve immediately.

My husband made delicious Ciabatta to go along with it.


Cream of Mushroom Soup

A hearty soup for the cold nights.  Perfect when you are having a busy week.

Course Soup
Cuisine American
Keyword Cream of Mushroom Soup
Prep Time 5 minutes
Cook Time 30 minutes
Total Time 35 minutes
Servings 6 people
Author Our Growing Paynes

Ingredients

  • 2 cup mushrooms, sliced
  • 3 tbsp butter
  • 1 cup onion, sliced
  • 2-3 cloves of garlic, finely chopped
  • 2 teaspoons fresh thyme
  • 2 heaping tbsp flour
  • 1 cup wheat beer 8oz
  • 2 cups vegetable bouillon
  • 1 cup heavy cream
  • pinch sea salt
  • pinch ground black pepper

Instructions

  1. Melt the butter in a saucepan.  Add the mushrooms and cook for several minutes to brown the mushrooms.  Then add the onions.  Cook until the onions are translucent.  

  2. Add the garlic and thyme and cook for a couple of minutes.  If the mushrooms have soaked up too much butter add a bit more before adding the flour.  Cook again for a few minutes then add the beer.  Bring to a simmer.

  3. Add the vegetable bouillon.  Season with the sea salt and pepper.  Simmer until it's near dinner time.  Add the cream then and bring back up to a simmer.  Serve with crusty bread.  


Kai Phat Khing (Chicken with Ginger) and Will There Be Progress?

Once again the world watches.  Watches while a woman testifies about sexual assault in front of powerful men whose first reaction is to say boys will be boys.  When I was my daughter’s age I remember the world watching as well.  The message was the same then as it is now.  That breaks my heart.

I want better for my kids.  It seems a reasonable ask to for those who have been assaulted to heard and to raise boys to men who know “boys will be boys” is outdated and dangerous.  I’m inclined to believe Dr Ford, given the timeline of who she told.  Whether or not it’s true, I believe a proper investigation needs to be done.  I’m surprised things were delayed and today they are hearing her given how many have seemed to come to a conclusion already.  I don’t believe the proper venue is in the senate.  I’m curious what the result will be but I’m doubtful as much hasn’t changed since Thomas was confirmed 27 years ago.  On the flip side, Cosby has been sentenced so maybe, just maybe the tide is shifting.

Thai Food:

It is a quiet week as my in-laws drove to New York to visit old friends.  I don’t envy them doing the 8+ hour drive.  It is not a very exciting highway, straight and dull.  Hopefully they will have a good trip.

That leaves just my husband and I.  I’ve gone to cooking up a storm for 6 people to 2.  You wouldn’t think it would be difficult to adjust but I always find it hard to do that.  I either end up making too much or too little.  Because we did a traditional roast this past Sunday I had leftover chicken to use up so I thought it would be great to make a Thai dish.  We are both fans of the cuisine and luckily it’s very easy to cook.

Kai Phat Khing (Chicken with Ginger) Technique:

I have a cookery book called The Complete Asian Cookbook by Charmaine Solomon.  In it, there is a recipe for Kai Phat Khing (Chicken with Ginger) that was a great choice to use up the chicken.  The interesting thing is the first ingredient in her recipe was wood ear fungus.  But the directions never mentioned putting it in the recipe!  At any rate, I used it as a light guide so I could use what I had on hand.

Hen of the Woods and Chicken of the Woods are great meaty mushrooms.

The co-op had hen of the woods and chicken of the woods mushrooms and I wanted them to be the highlight the dish.  Because I wasn’t sure when my husband would be home I prepped all the ingredients first as it only, when using leftover chicken, takes a few minutes to cook.

You can make this in a skillet but it’s better in a wok if you have one.  Heat the peanut oil.  The 2 tablespoons may sound like a lot but when the mushrooms get tossed in, it’s needed.  But first cook the onions for a few minutes.  When the onions start to become translucent add the garlic.

Keep an eye on the garlic!  The oil is very hot and you want the garlic to be golden, not burnt.  If you are using uncooked chicken, start cooking it now.  Add the mushrooms to the wok.  This needs to be cooked for a few minutes given how hearty the mushrooms are. While this is cooking add the ginger and stir well to coat the mushrooms.  The book mentioned making the ginger less “pungent”.  No way!  The ginger is a great flavour, I have no desire to dull it.

Allow the mushrooms to start to brown a bit.

Add the soy sauce/vinegar mixture along with the leftover chicken.

Near the end of cooking add the scallions.  I don’t like them full on raw but you don’t want these mushy or overcooked.

Garnish with a bit more scallion and serve right away.  As per my usual, I asked my husband how he liked it.  He really liked it but then said though you’ll probably not make it again.  Not true, but someone needs to remember and request.  Fingers crossed one of us doesn’t brain cramp.  🙂

Kai Phat Khing (Chicken with Ginger)

A flavourful Thai dish with chicken, ginger and mushrooms

Course Main Course
Servings 2
Author Our Growing Paynes

Ingredients

  • 2 cups Mushrooms, coarsely chopped I used Hen of the Woods and Chicken of the Woods
  • 2 tbsp freshly grated ginger
  • 2 tbsp peanut oil
  • 1 small onion, thinly sliced
  • 3-4 cloves garlic, coarsely chopped
  • 1 cup cooked chicken If using raw, use about 1/2 lb cubed
  • 1 1/2 tbsp soy sauce
  • 1 tbsp fish sauce
  • 1 1/2 tbsp rice vinegar
  • 1/2 tbsp brown sugar
  • 1 scallion, sliced

Instructions

  1. Mix the soy sauce, fish sauce, rice vinegar and brown sugar together and set aside.  

  2. Heat the peanut oil in the wok.  Cook the onions until they start becoming translucent.  Add the garlic.  Cook for another minute before adding the mushrooms.  If you are using raw chicken, add it now.  Add the ginger and stir to coat the mushrooms.  

  3. After cooking for a few minutes add the soy sauce mixture.  Stir well.  Allow the mushrooms to begin to brown a bit.  Near the end of cooking add most of the scallions to cook a minute or so.

  4. Serve immediately and garnish with the remaining scallions.

Pork Belly and Who Are You Calling a Witch?

Sometimes distractions can be really fun.  Last Friday I hosted a lunch to meet distant cousins that I connected to through the DNA on Ancestry.  Which meant I needed to get our shared branch in order.  For me, that means going straight down the rabbit hole to find out more and more.  I completely lose track of time.  However, I’m really glad I did as I found a connection to the Salem Witch Trials.

A horrible time in history of hysteria which largely started because of a fungus on the rye grains.  I got my ancestry back to Esther Elwell neè Dutch and the trials suddenly popped up.  I found a deposition accusing her and two other women of pressing, choking, and squeezing a Mary Fitch who died.  A seventeen year old girl was witness to this.  I’m thinking holy moly.  Until I did more digging.  The witness had visions, Mary Fitch just had an illness.  The stroke of luck for my ancestor was that the court was dissolved a few weeks before her arrest because more and more “reputable” people were getting accused so the court finally thought, hey maybe we shouldn’t be using visions as evidence.  Esther wasn’t the only one I found, a Rachel Vinson neè Varney was also accused.  Scary times.  If they had been charged, it would have been a death sentence.

It made for a very interesting lunch!

Recently I’ve seen a few blogs using pork belly and I thought it was high time I took the pork belly out of the freezer and create something.  I’ve just added a WP Recipe Maker plugin to, hopefully, allow for a printable recipe below.  Please let me know what you think and if you have any issues.  I’m starting with the free version so I can’t include unit conversion but I should be adding that down the road.

Pork Belly How-To

Preheat the oven on convection/fan to 425F/220C.

It looks like a lot of mustard but it will not overpower the flavour.

In a roasting dish add the pork belly that has been scored, seasoned with sea salt and pepper, and rubbed down with brown mustard.  Roast for up to 30 minutes.  Keep an eye on this!  You want the skin crispy but not burnt.  Then turn the oven off of convection/fan and set the temperature to 300F/150C.  Bake for another hour or so.

Normally at the co-op the red onions are massive but suddenly they fit neatly in the palm of my hand and I have small hands.  In a skillet, take a couple of tablespoons of the drippings from the roasting pan, heat up the skillet.  Finely chop a small onion and two cloves of garlic.  Sauté on medium heat.  As the onions become more translucent chop up a mushroom or two.  Add them to the skillet and stir well.

When the mushrooms start to brown add 1/2 cup/4oz of vegetable bouillon along with 2 tablespoons of brandy.  Add a dollop of brown mustard.

Yes, more mustard! But it works. 🙂

Stir well and let simmer.  In the meantime cook up 1/2 cup of quinoa.

To serve, place a large handful of lettuce greens on the plate, add a few spoonfuls of quinoa then top with the pork belly and sauce.  It’s the kind of dish that straddles the hot and cool of the beginning of autumn.  Getting tired of salads but not quite ready for stick to your ribs food.


Pork Belly with a Mustard Garlic Sauce

A flavourful recipe by Our Growing Paynes that highlights the pork belly with a mustard garlic sauce.  

Course Main Course
Cuisine American
Prep Time 15 minutes
Cook Time 1 hour 30 minutes
Total Time 1 hour 45 minutes
Servings 2
Author Our Growing Paynes

Ingredients

  • 1/2 lb pork belly 227 grams
  • 1/3 cup brown mustard 3 oz
  • 1 small onion
  • 2 cloves garlic
  • 1-2 white button mushrooms
  • 1/2 cup vegetable bouillon 4oz
  • 2 tbsp brandy 1oz
  • 2 pinches sea salt
  • 1 pinch ground black pepper
  • 1/2 cup quinoa
  • lettuce
  • 3 tbsp pork belly drippings 1.5oz

Instructions

  1. Preheat the oven on convection/fan to 425F/220C.

    Score the pork belly with a diamond pattern through the fat but not the meat.  Season with sea salt and ground black pepper.  Rub brown mustard all over the meat.  Place in a baking dish and roast uncovered for up to 30 minutes. Keep an eye on it!  You want to crisp the skin but not burn it.

    Reduce the heat to 300F/150C on regular bake.  

  2. Take the pork belly drippings and add to the skillet.  Heat up.  Finely chop the small onion and sautè in the skillet.  Finely chop the garlic and add that to the skillet.  While the onion is becoming translucent chop up the mushrooms and sauté. 

  3. Once the mushrooms begin to brown add the bouillon, brandy and mustard.  Stir well and let simmer.  

  4. Cook the quinoa according to the instructions.

  5. Add lettuce greens to the plate, top with quinoa, pork belly, and the sauce.  

Brussel Sprout Sliders

A quick post today as we’re getting ready to hit the road for university tours.  It seems so surreal that our daughter is old enough to be thinking about university but it’s here!  She’s ready for the next chapter and excited about it.  I look forward to see where her journey takes her.

This past weekend I made a dinner for my husband as a thank you for holding down the fort during tax season.  It’s a lot of extra work for him for which I am grateful he takes on.

One thing he loves is Brussel sprouts so that definitely had to be on the menu. Just for him mind as I can’t stand the stuff!  I came across an idea on Pinterest for vegetarian Brussel sprout sliders with tofu, I think plus there were asian flavours.  I thought it would be a fun idea with streaky bacon and french flavours.

Brussel sprouts sliders 1 2018

In a small bowl add two parts olive oil to one part champagne vinegar.  Finely chop 2 small cloves of garlic and add a healthy dollop of brown mustard.  Season with sea salt and pepper.

Brussel sprouts sliders 2 2018

Mix well and coat the sprouts.  Reserve the remaining mixture.

Brussel sprouts sliders 3 2018

Roast in the oven at 350F/175C.  Cut 3 rashers of streaky bacon into squares.  Cook them up in a skillet, slowly rendering them.

Brussel sprouts sliders 4 2018

When the bacon has been cooked remove from the skillet and set aside.  Drain the bacon fat until you have a couple of tablespoons left in the pan.  Add to the skillet thinly sliced onion.  I was only making 4 sliders so I did a half a cup.  Cook slowly to soften and caramelise.

Brussel sprouts sliders 5 2018

When they are halfway cooked add the remaining mustard mixture to the onions.  Continue to caramelise.

Brussel sprouts sliders 6 2018

Once all the ingredients have been cooked assemble into sliders.

Brussel sprouts sliders 7 2018

My husband really enjoyed these so I’ll be making these again.  Just a small way to show my gratitude.


French Onion Quiche and the Walls Come Tumbling Down Again…

They say wisdom comes with age. When it comes to house projects, my husband and I finally got wisdom! We’re redoing our bathroom and bedroom and instead of slogging our way through the demo we saved up and got our contractor to do it. What a difference. I can breath, we’re not exhausted and not filthy.

Our puppies, on the other hand, are less than impressed with the cacophony going on. I wish I could make them understand what’s going on but I can’t. So all I can do is give them loads of cuddles. Fingers crossed this project goes quickly.

Because we were facing a potential few hours of laying insulation (way too much fun, I know!) I made dinner during the day so we wouldn’t starve afterwards. Turns out, it was a quick job, thank goodness. As we also got several inches of snow to clear it was nice to have dinner ready.

I was inspired by a pin I saw for a French onion tart with bacon and I thought it would be fun to use my French Onion Soup in a quiche. This is easy to put together but just don’t rush it.

To begin cut up about seven rashers of streaky bacon and slowly render them on medium heat. Cook until about 2/3s done.

While the bacon is cooking slice a half an onion thinly. Finely chop two cloves of garlic and coarsely chop a couple of mushrooms.

Remove the bacon and set aside. Pour out the bacon fat until you only have about two tablespoons of fat left in the pan. Add the onions and cook slowly. Once they begin to soften add the garlic and mushrooms. Sauté for a few minutes. Add a cup of veg bouillon, a tablespoon of Worcestershire sauce and two tablespoons of brandy. Stir in a healthy dollop of stone ground mustard.

Bring this to a medium simmer to reduce the broth. Meanwhile prepare the pastry using half the recipe I used in the pie. Grate half a cup of Jarlsberg and half a cup of smoked Gouda. In a bowl beat three eggs together then had a half cup of cream and 3/4 cup of milk.

Once the broth is nearly reduced add back in the bacon. Continue until the broth is nearly gone. Spread it into the bottom of the pastry.

Sprinkle the cheese over the mixture then pour the egg and milk into the dish.

Bake for 15 minutes at 425F/220C then bake for about 30 minutes at 300F/150C. Remove once the quiche is set and golden.

Either serve it right away or save and heat up later.

Quick question, I’ve suddenly gotten a lot of followers from outlook mail accounts. While I’m grateful for followers I’m concerned there maybe something else going on.

Steak and Mushroom Pie

It’s time to get in the festive mood! It’s the fun month between Thanksgiving and Christmas. Though I’m already over the cheesy modern Christmas music. Just not the same as the standards. My husband and I had a quiet Thanksgiving as our kids were in South Carolina. My aunt very kindly invited us to her place for Thanksgiving dinner. We had a lovely meal and a lovely time. She is an awesome aunt and she’s very good to us.

Even though the weather can’t decide to be warm or cold this season there has been been opportunity for comfort food. And you can’t go wrong with steak and mushroom pie.

In a small bowl, add about 3 oz of flour and season with sea salt and pepper. Mix well. Take a half pound/8oz of stewing steak and cut it into small cubes. Toss in the flour until well coated.

Heat a couple of tablespoons of olive oil in a saucepan and start browning the steak.

Coarsely chop a shallot and a couple of cloves of garlic. Add to the pan.

Cut up enough mushrooms to make half a cup/3-4oz. Sauté in the pan then add about 2 1/2 cups/20oz of vegetable bouillon. Bring to a simmer. For seasoning and flavour I added a half cup of dry sherry and a small handful of fresh oregano, chopped. Slow cook on low for a few hours until the steak is tender and falling apart. To thicken the broth, add either a couple of teaspoons of flour or corn starch(flour) to a couple of tablespoons of water to make a slurry. Add this to the saucepan and bring up to a boil to cook the flour and thicken the broth. Adjust the seasoning as needed as sometimes the flour can dull the flavours.

Split the stew between ramekins. I made enough for two. Melt a tablespoon of butter and brush individual layers of phyllo dough to top the ramekins. Broil/grill til the top is nice and golden.

Perfect with a nice deep red wine on a chilly night!

Making a Leftover Thanksgiving Turkey Mac and Cheese 

We’ve all done it.  Opened the door, peered in, shut it again.  Left to wonder what exactly is in that freezer.  Despite best laid plans it’s easy to lose the plot.  Our freezer is nearly 6 feet tall so it’s really not a good idea to lose the plot!  It got to the point where we couldn’t fit anything in and I was wondering how much money we were wasting by not using what we had.  

Off I went to get clear containers to organise the meats, leaving the baskets for all our fruits and veg we had harvested.  I did have to get rid of some things but overall getting it organised and knowing what the heck was in there was a success.  

One of my finds was a vacuumed bag of leftover Thanksgiving turkey.  So this post is either well overdue or too early for Thanksgiving.  😄.  Even though we seem to be stuck back in with the sticky heat of summer we did enjoy autumn weather for a few weeks.  It was wonderful and perfect for some comfort food.  Mac and cheese would do the trick.


Would you believe this onion was supposed to be a scallion?  We planted half a raised bed of bunching onions so you imagine our surprise to find proper onions growing.

While making the cheese sauce for this dish, cook up the pasta.  Preheat the oven to 375F/200C. In a separate saucepan heat up a couple of tablespoons of butter.   Coarsely chop half of a large onion and add it to the butter.


Sauté on low until the onions soften.  Then add a couple of cloves of garlic, finely chopped.  Cook for a couple of minutes then add about a cup and a half of chopped turkey.  Season with a couple of teaspoons of fresh thyme and sage.  If you don’t have fresh sage use about a teaspoon of ground sage.  Continue to season with sea salt and pepper.  Then add a half cup/4oz of dry white wine.


To make it a roux add 2 tablespoons of flour.


Stir continuously until the flour is incorporated and cooked, about three minutes.


Next add 1 1/4 cup of milk and heat through.  Don’t boil!  Once the cheese is warm enough to melt cheese add a cup of grated cheddar and half a cup of freshly grated Parmesan cheese.  Stir until the cheese has melted,


Put the cooked pasta into a baking dish and add the cheese sauce.  Mix well. Top with more grated cheese.


Cover and bake for 20 minutes.  Uncover and brown the top of the dish.


Serve while hot.  Now we try to eat small portions in our house but with this dish we all had seconds and there weren’t any leftovers!  Guess we needed a break from salads.  😊

Chili Mushroom Bowls

And just like that summer is over, at least for the kids.  Off to school they went yesterday.  Summer seemed like a blur for all of us.  I am ready for autumn to arrive.  I am ready to say goodbye to the humidity and heat, which has been pretty bad this year.  Bring on the crisp days!

When I was food shopping with my daughter we found large portobello caps that looked like bowls.  Which gave me a fun idea.  Instead of bread bowls, why not mushroom bowls?

Chili bowl 1 2016

To fill the bowls I made a quick chili.  Normally you cook chili over a few hours but as this doesn’t have beans, this can be made in less than a half hour.  In a skillet heat up a tablespoon or two of olive oil and begin to saute a half pound of ground beef.

Chili bowl 2 2016

Chop about half a cup of red onion and a couple of cloves of garlic. Add that to the skillet.

Chili bowl 3 2016

After the onion starts to soften add a can of diced tomatoes (14oz) and bring to a simmer.  Begin to season with chili powder, cumin, and sea salt and pepper.  The beauty of this dish is you decide how much seasoning to put in.  Some like it hot and some don’t.  I would say the ratio of the chili powder to the cumin should be about 4:1.  As we like it hot I added a dollop of hot sauce that I made along with chopped bell pepper.

Chili bowl 4 2016

Mix well and cook the peppers for a few minutes.  Pre heat the oven to 400F/200C.  Fill the mushrooms with the chili mixture.

Chili bowl 5 2016

Top with shredded cheese and bake until the mushrooms are cooked.  You don’t want to cook the mushrooms so much that they collapse.

Chili bowl 6 2016

Top with sour cream and enjoy!  This is a very easy meal to through together on a weeknight.  And it’s a fun twist on the whole food for a bowl thing.


Pasta with Mushroom Sauce and Saying Goodbye to 2015, Finally!

It’s been a long time since I was so looking forward to seeing the backside of a year.  I don’t like rushing time, especially as we get older.  It goes fast enough as it is.  But this year been a long stressful slog.  2016 has to be better!

I am so grateful that I have my husband and kids.  They have been an amazing support system for me.  Since the summer I’ve been struggling with my issues, whether it was physical injuries or the black dog, as Conor from One Man’s Meat so aptly called it, and I feel like I got in a rut.  It was an effort at times to get the day to day stuff done, nevermind finding creativity for blogging and other projects.  My husband never wavers and never complains.  He takes care of me and has the ability to make me laugh every day.  And kids being kids, they keep you on your toes.  They are a joy to have.  Not sure what I did to get so lucky to have them in my life but boy am I glad I did it.

But I am looking forward to 2016 and a fresh start in terms of putting this year behind me and not letting it be a millstone round my neck.  I have ideas I want to try and plan on keeping on improving with all the issues.  Onwards and upwards!

My sister got me a fabulous book on food photography for Christmas.  My family is so good about supporting my endeavors.  Last year my husband found me a photobox and a photography book which helped me dust off the cobwebs of my photography knowledge.  This book is the next step up from the previous book.  After a year of practicing I am excited to learn new techniques and continuing to improve.  I’m only into the fourth chapter and already I have a list in my head of things I need to set up.

Last night my sister and family were planning on coming so I planned Italian for dinner.  Unfortunately, the New England weather decided it was time for the first winter storm.  But I had found a recipe from the cookery book Giada at Home by Giada De Laurentiis.  So I stuck with the planned theme.

Mushroom pasta 1 2015

It is the Rigatoni with Creamy Mushroom Sauce.  This is my adaptation of it.  I didn’t stray too much from the original but I did make it my own.

In a skillet heat up a few tablespoons of olive oil.  Finely chop up half a red onion and begin saute the onion.  Finely chop up 3-4 cloves of garlic and add it to the skillet.

Mushroom pasta 2 2015

While this is cooking slice up a mixture of mushrooms.  I used baby bellas (cremini), shiitake, and oyster mushrooms.  You want about 2 cups sliced.  Add these to the skillet to start to brown.

Mushroom pasta 3 2015

Add 1/2-3/4 cup of vegetable bouillon and 1/2 a cup of dry white wine.  Bring to a simmer to reduce the liquid by at least a third.

Mushroom pasta 4 2015

During this time make sure you cook the pasta.  I chose brown rice spaghetti.  When the pasta is nearly done add a half cup (4 oz) of mascarpone.

Mushroom pasta 5 2015

When the mascarpone has blended in add 1/2 cup of freshly grated parmesan and a handful of chopped chives.  Season with sea salt and pepper.  Add the pasta to the skillet and toss to coat.

Mushroom pasta 6 2015

Garnish with chopped chives and grated parmesan cheese.  My husband made fabulous ciabatta bread.  He used it to make garlic bread.  A serious weakness of mine!

This dish was a hit even with my son who doesn’t like mushrooms.  Fingers crossed his tastes are changing.  The rest of us love mushrooms.

Happy New Year’s everyone!