Lemon Thyme Bars

Lemon Thyme Bars were requested by my daughter for her first care package and I was happy to oblige. It is also the start of settling all of us into the next chapter with her off to college. What an adjustment it has turned out to be. I knew it would be hard, we’re not heartless and we like having her around but we’re not helicopter parents either. Turns out, that doesn’t make any difference whatsoever!

Move in day was quite the event with the heat index at 107F/42C but I was impressed with how the college handled everything with volunteers and plenty of water stations. They even had in the schedule the time parents should say goodbye. During that time they did tell us tales of velcro parents not wanting to leave on the first day. Can you imagine? So of course we teased our daughter asking her to text every five minutes, text after she falls asleep, before she wakes, etc. She was ready for us to leave after that. LOL.

Thankfully, she has settled in and she is doing very well. That doesn’t mean she isn’t happy to receive care packages and home baked goods. When she requested these Lemon Thyme Bars I was surprised to realise I hadn’t made these before. Which is silly as they are very easy to make and a lovely treat.

Technique for Lemon Thyme Bars

Preheat the oven to 350F/175C.

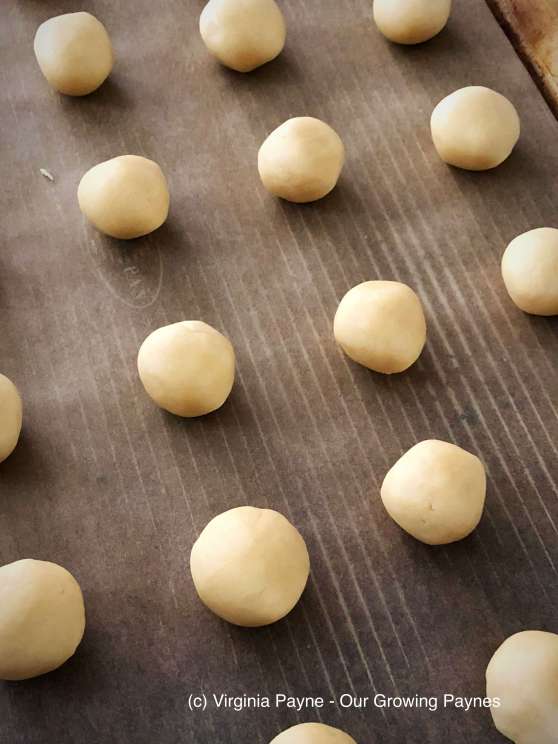
Using your fingers or a pastry fork, blend the butter, flour, sugar and thyme to make a crumbly mix that will stick together when gently pressed.

Press into a baking pan 9″ x 13″. Make sure there aren’t any holes.

Bake 15-20 minutes until golden. It won’t be overly firm while really hot. I wanted the shortbread on the softer side so I only baked it for 15 minutes. The longer you bake at this stage the crispier it will be in the final result.

Whisk the lemon juice and eggs together. In another bowl, mix the sugar and flour together.

Pour the lemon egg mixture into the flour and sugar. Whisk well to remove any lumps. Pour over the shortbread. Bake for 20 minutes. Remove from the oven and let cool. The lemon will set as it cools.

Dust with powdered/confectioner’s sugar to serve.

Of course, I had made these on a Thursday without thinking about the travel time for shipping as it was coming up on a holiday weekend. Turns out, our daughter is considered in the middle of nowhere according to the Post Office. Fortunately, they arrived several days later in good condition. I’ll have to do my baking at the beginning of the week from now on.

Lemon Thyme Bars

The flavours of summer in a delicous baked treat

Course Dessert
Cuisine American
Keyword Lemon Thyme Bars
Prep Time 10 minutes
Cook Time 40 minutes
Author Our Growing Paynes

Ingredients

Shortbread

  • 1 cup softened butter
  • 1/2 cup sugar
  • 2 cups all purpose flour
  • 2-4 tsp fresh, chopped thyme

Lemon Mixture

  • 4 eggs, beaten
  • 4 tbsp lemon juice
  • 1 1/2 cup sugar
  • 1/4 cup all purpose flour

Finishing

  • powdered sugar to dust over bars

Instructions

  1. Preheat oven to 350F/175C

Shortbread

  1. Using your fingers or a pastry fork, blend the shortbread ingredients together until it becomes crumbly but will stick together when gently pressed.

  2. Press into the baking pan (9" x 13") making sure there aren't any holes. Bake 15-20 minutes until golden. The less you bake, the softer the shortbread will be when the bars are cooled.

Lemon Mixture

  1. Whisk the dry ingredients together in a bowl. In another bowl, whisk the wet ingredients. Pour the lemon mixture into the dry ingredients. Whisk until there are no more lumps.

  2. Pour the mixture over the shortbread and bake for 20 minutes. Allow to cool completely before removing from baking pan. Dust with the powdered sugar to serve.

Blood Orange Jaffa Cakes

Unlike these Blood Orange Jaffa Cakes I made, blogging consistently the first few months of the year doesn’t seem to be my jam! With the craziness of tax season and the inevitable germ fest I get caught up in, life just gets nutty and I always seem behind. I realised it had gotten bad when I had only managed one journal entry for this month in my bullet journal.

I had this past Sunday off and it was time for grooving to good music and bake in the kitchen. It was a beautiful sunny day and it was wonderful to take a break from the stress and just enjoy myself. On deck was the Fruit Cake that my husband loves. But I wanted to make another treat for him. He loves Jaffa Cakes and it’s one the of treats his mum packs when she visits. I get the McCoys and he gets Jaffa Cakes, it’s lovely! His mum had clipped a recipe for Jaffa Cakes from the iNews paper for us. I made a few adjustments to the recipe because I wanted to use blood oranges and it calls for 40g of butter, which is great except it said to set aside 30ml for the recipe and use the remainder for greasing the muffin tin. There wasn’t any extra butter so I used spray oil.

Technique for Blood Orange Jaffa Cakes:

This is not a difficult recipe to make but it is time consuming so it’s a perfect weekend bake.

The Jelly:

Such a gorgeous red.

Squeeze the two oranges and set aside. Combine the water, sugar and orange peel in a saucepan.

Bring to a boil and then simmer until the liquid has reduced about 50%. This will take 10 or 15 minutes.

Strain the mixture into a bowl.

Add the gelatin powder and stir until fully incorporated. Make sure the syrup is still quite warm. I found it cooled off too quickly and didn’t incorporate fully. It still worked but at the end the centre was more set than the edges. So make sure you can keep it warm enough.

Pour then orange juice into the syrup and mix well.

Line a 18cm/8in square pan with cling film and strain the mixture into the pan.

Chill in the fridge for at least two hours so it sets properly.

Baking the cake:

Preheat the oven to 375F/190C.

Brown the butter in a small saucepan.

This part can be tricky. The butter can quickly go from a golden colour to full on brown. Don’t panic, as long as it doesn’t taste burnt and keeps the toasted, nutty flavour. Let the butter cool while getting the other ingredients together.

Sift the sugar and flour together.

Using a whisk, incorporate the almond flour and orange zest into the flour and sugar.

Lightly beat the egg whites. Add that along with the salt and butter. Mix well with the whisk.

Spoon the batter into a 12 hole muffin tin that has been lightly greased. Bake 9-12 minutes until golden round the edges and is springy to the touch. Cool completely before turning the cakes out.

Place the jelly with the cling film on the counter and using a 4cm/1 1/2in cookie cutter. Place the cut jelly onto the centre of each cake.

Melt the chocolate and spoon it over the top of the cakes.

Let the chocolate set and enjoy! The only bad thing about this recipe is that it only makes 12 cakes!

Blood Orange Jaffa Cakes

A traditional recipe with a twist.  

Course Dessert
Cuisine English
Keyword Blood Orange Jaffa Cakes
Prep Time 2 hours
Cook Time 12 minutes
Total Time 2 hours 12 minutes
Servings 12
Author Our Growing Paynes

Ingredients

Blood Orange Jelly

  • 60 grams caster sugar
  • 120 ml water
  • orange zest from 1 blood orange
  • 1 packet powdered gelatine
  • 100 ml blood orange juice

Cake

  • 40 grams browned butter
  • 60 grams icing/powdered sugar
  • 20 grams all purpose flour
  • 40 grams ground almonds or almond flour
  • orange zest from 1 blood orange
  • 2 egg whites, lightly beaten
  • a pinch of salt

Chocolate to top the cake

  • 120 grams dark or semi-sweet chocolate

Instructions

Blood Orange Jelly

  1. Bring the water, sugar and orange zest to a boil.  Simmer until the liquid has reduced 50%.  Takes about 10-15 minutes.  

  2. Strain the syrup into a bowl and add the gelatine.  Mix until dissolved.  Add the blood orange juice.  Line a 18cm/8 in square pan with cling film.  Strain the mixture into the pan.  Chill for 2 hours.  

Making the cake

  1. Preheat the oven 190C/375F.

    Grease a 12 hole muffin tin.

  2. Brown the butter and let cool.

  3. Sift the sugar and flour together.  Whisk in the almond flour and orange zest. Add the egg whites, salt and browned butter.  Using the whisk, incorporate the ingredients well.  

  4. Spoon the batter evenly between the 12 muffin holes.

  5. Bake 9-12 minutes until the edges are golden and the sponge is springy to the touch.  Allow to cool completely before turning out of the muffin tin.

Assembling the Blood Orange Jaffa Cakes

  1. Using the 4cm/1 1/2in cookie cutter, cut out the jelly and place on the cakes. Melt the chocolate and spoon over the cakes.  Let set and serve.  

Apple Tart with Crème Pâtissière and Toffee Sauce

The wind has been howling this week, getting as many leaves as possible off the trees and wreaking havoc with the existing leaf piles waiting for pickup.  It’s nearly Guinness cold where our old pup starts getting a pep in his step on the way back from our walks.  A salve against the cold is baking.  As we still have apples to use up I thought it would be fun to make a decadent Apple Tart with Crème Pâtissière and Toffee Sauce.  If you are going to go the guilty pleasure route, you might as well go all the way!

Technique for the Apple Tart:

There are a few steps to this dessert but it’s worth it.

Tart crust:

I used the basic recipe from “Baking with Mary Berry” with the addition of a pinch of salt.  Preheat the oven to 400F/200C.

Butter needs to be quite chilled!

Use a pastry fork or your fingers to blend the butter into the flour and salt.  Try to keep your fingers on the cool side if you use your hands.

Once the mixture becomes like fine bread crumbs and they stick together when gently pressed.  Gradually add a bit of water, using your fingers to incorporate the water into the mixture.  Be careful not to overwork the dough.  When it comes together turn it out onto a floured countertop.

Roll out thinly and place into a 9″/23cm tart pan.  Allow the pastry to be higher than the tart pan as the pastry will shrink during the blind bake.  Lightly prick the base of the pastry.

Line with tin foil and fill with dried beans or baking beads.

Bake blind for 10 minutes.  Remove the tin foil and beads.  Trim the pastry edges to the height of the tart pan.  Pop back into the oven for another 10-15 minutes until golden and flaky.  Set aside.

Fillings:

Prepare the crème pâtissière as I did in this Merinque Nests recipe and let cool a bit.

Peel the apples and slice them thinly.  Melt the butter and begin to sauté the apples.  Add the brown sugar, cinnamon and nutmeg.  Cook until the apples have softened but still hold their shape.

Make the Toffee Sauce but half the recipe as you don’t need too much for the tart.

Putting it together:

Spoon the crème pâtissière into the pastry.  Top with the apple mixture then drizzle the toffee sauce over the apples.

Remove the tart ring, slice and serve!

Decadence is served.  🙂

Apple Tart with Crème Pâtissière and Toffee Sauce

A decadent dessert to use up all those apples from apple picking.

Course Dessert
Cuisine American
Keyword Apple Tart
Prep Time 45 minutes
Cook Time 20 minutes
Total Time 1 hour 5 minutes
Servings 8
Author Our Growing Paynes

Ingredients

Pastry Tart

  • 1 1/2 cup all purpose flour
  • 6 tbsp chilled butter
  • pinch salt
  • 3-5 tbsp cold water

Crème Pâtissière filling

  • 5 egg yolks
  • 1 cup granulated sugar
  • 1/2 cup flour
  • 2 cups boiling milk (don't scald!)
  • 1 tbsp butter
  • 1 1/2 tbsp vanilla extract

Apple Filling

  • 2 apples
  • 3 tbsp butter
  • 2 tsp ground cinnamon
  • 1 tsp ground nutmeg
  • 1 tbsp brown sugar

Toffee Sauce

  • 4 tbsp butter
  • 1/2 cup brown sugar
  • 1 1/2 tbsp brandy
  • 1 1/2 tbsp heavy/double cream

Instructions

Pastry Tart

  1. Preheat oven to 400F/200C.  In a mixing bowl add the flour and salt.  Mix then add the chilled butter.  Using your fingers or a pastry fork work the butter into the flour.  Work it until the mixture is like fine bread crumbs.  Then gradually add the water a bit a time while incorporating it into the pastry.  Don't add it all at once!  You might not need all the water.  Stop once the pastry becomes a ball.  

  2. Turn out the pastry on a floured surface.  Roll out thinly then place into a tart pan 9in/23cm.  Gently press the dough into the fluted sides.  Allow the dough to be higher than the sides as it will shrink while baking  Prick the bottom with a fork.  Line with tin foil and fill with dried beans or baking beads.  

  3. Bake blind for 10 minutes.  Remove from the oven and remove the beads and tin foil.  Trim the sides to the height of the tart pan.  Bake for 10-15 minutes more until golden and flaky.  Set aside.  

Crème Pâtissière filling

  1. Add the egg yolks to a mixer with a whisk.  Beat on medium.  Gradually add the sugar.  The colour will change to a pale yellow.  Once the sugar is incorporated, beat for another 2-3 minutes and it forms "the ribbon".  Don't go past this point as the sugar will re-granulate.  

  2. Boil the milk.  While this is coming to a boil add the flour to the egg mixture.  Then gradually add the milk while beating on medium speed.  

  3. Add the mixture to a saucepan and bring to a boil.  Keep whisking through this step!  It will thicken up quite a bit but then it will smooth out.  Once this happens cook for 2-3 minutes to cook the flour.  

  4. Remove from the heat and add the butter and vanilla.  Stir well and set aside to cool.  

Apple Filling

  1. Peel and thinly slice the apples.  Melt the butter and sauté the apples in the butter.  Add the cinnamon, nutmeg and brown sugar.  Cook the apples until they start to soften.  Remove from the heat.

Toffee Sauce

  1. In a saucepan melt the butter.  Add the remaining ingredients and heat thoroughly until the sugar is incorporated.  

Putting it together

  1. Spread the crème pâtissière into the tart, top with the apples.  Drizzle the toffee sauce over the tart.  


Sticky Toffee Pudding and Visiting In-Laws

Sticky Toffee Pudding!  There that should give me a green light on SEO scale.  Why the sudden abrupt start?  Well, I’m figuring out the new plug ins to improve the SEO.  Apparently they recommend using the focus keyword right out of the gate.  Yeah, I won’t be making a habit out of that.  It seems the equivalent of a brass band starting this off.  And I don’t have the lurgy so I’m just trying it out once to see what happens. As for this plugin, the proof will be in the pudding.

Pudding you say?  Well let’s get on with the reason we’re here.  Food!

Treating the In-Laws:

As many of you know we’ve been working on redoing our bedroom.  We had a definite deadline as my in-laws arrived this week.  Down to the wire but they were pleased to know they had a guest room to stay in!  We always have fun when we get together and this weekend we start it off with glassblowing.  Thank goodness the weather has turned cool as it’s a very hot activity.  Hopefully we’ll get some hiking in but the remnants of Florence will be blowing through next week.  I really hope their holiday isn’t rained out.

My mum-in-law runs a B & B so she looks forward not to have to do anything in the kitchen.  I try to treat them with meals and good desserts. I picked sticky toffee pudding as it’s a traditional pud.  Turns out my mum-in-law has never had it as she tries to be good.  Ah well, it’s holiday!

I did research the recipe online and for the most part it’s straight forward and relatively the same.  Unless you are Martha Stewart.  She made it weird.  As I have the “Baking with Mary Berry” book I decided to use that.  But while I was at tax class I looked her recipe up online to double check my ingredients.  Wouldn’t you know it, they were two completely different recipes!  The book uses dates and the online used black treacle.  I mean, really.  I chose the book with a little variation.

The Technique for Sticky Toffee Pudding:

I decided to use the recipe with the dates as I love that fruit.  Her recipe calls for walnuts but enough of my family members really don’t like nuts in the baked goods so I just increased the dates called for.

Preheat the oven to 350F/180C

Coarsely chop the dates.

Instead of a cup of dates, I increased it to 1 1/2 cups of coarsely chopped dates to make up for the removal of the walnuts.

In the mixer, cream together 6 tablespoons of softened butter with 1 cup of lightly packed brown sugar.  Then add 2 beaten eggs with a tablespoon of coffee.  Mix well.

Now if you have access to self raising flour, use 1 1/2 cups of that.  If you don’t, take 1 1/2 cup of all purpose flour, add 2 teaspoons of baking powder and 1/2 a teaspoon of salt.  Gradually add this to the mixing bowl and again mix well.  A note on the flour.  There are times the flour can be really drying with the ingredients.  I’ve had trouble with it this week.  I’m not sure if the co-op changed vendors or what but unbeknownst to me it was affecting this dish.  More on that later.  Add the dates and 3/4 hot water (not boiling).

Lightly grease an 8″/20cm square baking pan and line the bottom with parchment paper.  Spoon the mixture into the pan.

Bake 45-50 minutes.  However, due to the flour issues, I should have checked it at 40 minutes.  But you get chatting and catching up and well, life happens.  Mine came out a little dry so thank goodness for the sauce.

Don’t do the sauce for the sticky toffee pudding until you are ready to serve.  If you do make it ahead of time, just microwave it to make it runny.

In a small saucepan add 9 tablespoons of butter (how isn’t Mary Berry massive) with 1 1/2 cups of brown sugar.  Heat on low-medium until the sugar is incorporated and dissolved in the butter.  Keep stirring so it doesn’t catch on the bottom.

Add 6 tablespoons of heavy/double cream.  Be careful doing this as it will sizzle and you don’t want to be splattered with hot sugar.  Also add a tablespoon of brandy.

The best part!

Not going to lie, I think the best part of sticky toffee pudding is the sauce.  I could just have a bowl of it.  I don’t think I could handle the full on sugar rush though!

Sticky Toffee Pudding

A delicious pudding with dates and a toffee sauce

Course Dessert
Servings 8 people
Author Our Growing Paynes

Ingredients

Cake

  • 6 tbsp butter, softened
  • 1 cup lightly packed brown sugar
  • 2 large eggs
  • 1 tbsp coffee
  • 1 1/2 cups self rising flour
  • 1 1/2 cups coarsely chopped dates
  • 3/4 cup hot water

Sauce

  • 9 tbsp butter
  • 1 1/2 cups brown sugar
  • 6 tbsp heavy or double cream

Instructions

  1. To make the cake:

    Cream the butter and sugar together.  Add the eggs and mix well. Then add the coffee.

    Gradually add the flour until well blended.

    Add the dates and water.

    Bake at 350F/180C for 45-50 minutes in a lightly greased 8"/20cm square baking pan.  Line the bottom with parchment paper.

  2. To make the sauce:

    Melt the butter with the sugar until the sugar is dissolved.

    Carefully add the cream and brandy.

    Drizzle over the cake when serving.  

White Chocolate Muffins for a Sweet Treat

Oh blogger’s block!  We’ve all been there.  This week, with us getting ready to go across the pond and the school year coming to a close, my mind was blank.  Crickets!  I try to plan a week ahead but nothing came to me.  The other night we were watching the Great British Bake Off.  Sadly not the one with Mary Berry.  Sorry to say but Pru is not Mary Berry! But it finally sparked inspiration.

I have one of Mary Berry’s baking books, “Baking with Mary Berry”.  She has a recipe for white chocolate and strawberry muffins which calls for strawberry jam.  I had my strawberry rhubarb jam in the fridge so I thought this would be fun to make for the kids.

This is a very easy recipe to make, in fact most of it’s done by the time the oven is preheated at 400F/200C.

The recipe calls for 2 1/2 cups of self rising flour.  If you don’t have that it is easy to make it.  Add 1 1/2 tsp of baking powder and 1/2 tsp of salt per cup of flour.  Sift all together and you are off and running.  I had to prep this and also melted 7 tablespoons of butter.

White Chocolate Muffins 1 2018

In the mixer bowl add 2 large eggs, beat them.  Then add the butter, a cup/8 oz of milk.  I used full fat milk here.  Next add 2 tsp of vanilla and 2/3 cup of sugar.  Tip in the flour mixture then blend everything until it’s smooth and incorporated.  Once it’s mixed add 100g of white chocolate chips.  Mix well.

White Chocolate Muffins 2 2018

Line a 12 well muffin tin with paper cups.  Spoon in half the batter divided equally between the 12 cups.  Spoon in a bit of jam in each cup.

White Chocolate Muffins 3 2018

With the remaining batter cover each muffin evenly.

White Chocolate Muffins 4 2018

Bake 25-30 minutes until they are golden and pass the toothpick test.  Allow to cool then dust with confectioners’ sugar.

White Chocolate Muffins 5 2018

I found this in the breakfast chapter but I think this would be a bit sweet to start the day with.  After school snack?  Perfect.  🙂  This would also work with a variety of fruit jams so the sky is the limit.


Custard Biscuits with Strawberry Rhubarb Jam

With the spring properly here now we are enjoying the fresh flavours that come with the warmer weather.  Our garden is coming along with the busy bees arriving to enjoy the blooms.  Our gooseberry and black currant bushes are a hive of activity which is wonderful.  The garden makes a happy place for the bees and butterflies.  Need to work on plants to invite along the hummingbirds.

One of my favourite flavours growing up was strawberry and rhubarb.  My mum would make a divine strawberry and rhubarb pie that I loved.  I wanted to bake something that would include that delicious combination.  I was flipping through the “Sweet” book by Yotam Ottolenghi and Helen Goh and found a recipe for Custard Yo-Yos that had a rhubarb icing.  I thought I would do a strawberry and rhubarb jam instead for the filling.

Custard biscuits 1 2018

Make the jam first to give it time to cool.  Use a ratio of 1:1 for the strawberry and rhubarb.

Custard biscuits 2 2018

In a small saucepan add the fruit and a bit of water so the fruit doesn’t catch as you bring it to a simmer.  Add brown sugar a bit at a time until you get the flavour and thickness desired.  You do want this on the thick side so it doesn’t drip too much out of the biscuit sandwich.

Preheat the oven to 350F/180C

In a mixer bowl sift together 175g/1 1/3 cups of all purpose flour, 65g/1/2 cup custard powder, 65g/1/2 cup confectioners’ sugar, and 1/8 teaspoon of salt.  If you don’t have custard powder ( 🙁 )  you can use cornstarch (cornflour) but it won’t be much of a custard biscuit without the custard!  I like using Bird’s custard powder.  One because it’s good and two it’s what we can easily find.  Cube 170g/3/4 cup of unsalted butter that is at room temperature.  Add it to the mixer bowl.

Custard biscuits 3 2018

Blend on low until the mixture resembles breadcrumbs.  Next add 1/4 teaspoon of vanilla extract.  If you had to use corn starch then make it 1/2 a teaspoon.  At this point you will probably be wondering, as I was, how on earth was this dry mixture going to come together.  Have no fear!  The butter starts it’s job with the vanilla.  Start on low then speed up to medium to bring the dough together.  It will take 30-60 seconds to happen.

Custard biscuits 4 2018

Line your baking sheet with parchment paper.  Roll balls of dough of about an 1 inch/2.5-3cm.  Place the balls about 1 1/2in/4cm apart.

Custard biscuits 5 2018

Dust a fork with flour and press into the tops of the balls.  Don’t go all the way through!  Just go about halfway.

Custard biscuits 6 2018

Bake for 25 minutes.  If you use more than one baking sheet, rotate them halfway through.  You want the biscuits dry on the bottom and slightly golden.  Leave them on the sheet for a couple of minutes then transfer them to a cooling rack.

When the biscuits and jam are cool make sandwiches.

Custard biscuits 7 2018

There is nothing like custard with strawberry and rhubarb.  Definitely flavours of the beautiful warmer weather.

Who Doesn’t Love a Tart? A White Wine Mushroom Tart…

See, when tax season ends it is supposed to be spring.  Normally I can get outside in the fresh air and putter about in the garden.  Mother Nature did not get the memo this year!  On Monday we had a two hour delay for school due to snow and ice.  It’s just been cold this week.  The strong winds took down a large tree in town.  She is being cruel!

I really hope the warm weather shows soon because it would be nice to have a spring longer than a couple of weeks.  Summer likes to show early here.

Every Tuesday night we have pizza and sometimes I buy a phyllo dough mushroom tarts with white wine.  It’s been on my list to recreate it but I decided instead of fiddling round with the phyllo that I would make my short crust pastry.

Mushroom tarts 1 2018

In a skillet melt 3 tablespoons of butter.  Finely chop shiitake mushrooms to give you a cupful.  Finely chop shallots until you have about 1/3 cup.  Sauté the mushrooms and shallots on medium heat.  Chop up fresh thyme and rosemary, about a small handful total and add them to the skillet.  After cooking for several minutes add a 1/4 cup/2oz of dry white wine.

Mushroom tarts 2 2018

Grate about 3/4 cup of jarlsberg and put it in a medium bowl and set aside.

Mushroom tarts 3 2018

Preheat the oven to 350F/175C and prep the pastry.  Technique to do the pastry is here.  For this recipe I used 1/2 cup/70g of flour, a pinch of salt, and just under a 1/4 cup of butter.  When the butter is fully incorporated into the flour gradually add cold water a bit at a time until the dough comes together.  Roll out thinly.

Add the mushroom mixture to the cheese and mix well.  Add a dollop to the pastry.

Mushroom tarts 4 2018

Pinch the dough closed and slice three vents into the top.  Brush with a beaten egg.

Mushroom tarts 5 2018

Bake for 20-25 minutes until the pastry is golden and flaky.

Mushroom tarts 6 2018

These are great for a cheese and wine night or if you have a potluck to go to.


Making Whoopie…Carrot Cake Pies That Is

The amount of chocolate our kids still have from Christmas is going to keep them going for quite awhile.  They would disagree completely with me, of course.  As scrooge like as I was being in the chocolate department I didn’t want to forego any treats.  I’m not that mean!

So what do bunnies really like?  Carrots!

Carrot Cake Whoopie Pies 1 2018

I did a search on Pinterest for fun easter desserts.  The plethora of Peeps desserts was a bit scary.  Aside from the fact none of us like Peeps, my kids aren’t little so something less sugar high inducing would do the trick.  I found this Mini Carrot Cake Whoopie Pies recipe and I thought it would be fun to make.  Not to mention easy!  And as we’re still plugging away at our renovation of the bathroom project, well, easy is key.

I will say the overall time to make this of 18 minutes is seriously over optimistic.  Give yourself an hour.  There is only so fast I can go!

Preheat the oven to 350F/175C

Begin with finely grating 180g of carrot.  This will give you 1 1/2 to 2 cups of shredded carrot.

Carrot Cake Whoopie Pies 2 2018

In a mixer add 113g/1 stick of butter (room temperature) along with 100g/1/2 cup of packed light brown sugar and 100g/1/2 cup of white sugar.

Carrot Cake Whoopie Pies 3 2018

Cream all this together for several minutes until creamy and blended well.  While this is mixing mix the dry ingredients together in a medium sized bowl.  Add 250g/2 cups all purpose flour, 1 1/2 teaspoons of baking soda, 1 teaspoon of baking powder, 1 teaspoon of cinnamon, 1 teaspoon of ground ginger, 1/2 teaspoon of ground nutmeg and 1/2 teaspoon of salt.

Carrot Cake Whoopie Pies 4 2018

Gradually add the dry ingredients to the mixer.  Once all the ingredients are mixed well add the grated carrot.

Carrot Cake Whoopie Pies 5 2018

Using a piping bag and a large nozzle pipe out the batter into circles about an inch/2.5cm onto parchment paper.  This is very sticky and they come out like wizard hats.  Don’t worry about that, it will smooth out in the oven.  Just tap down the real pointy peaks.

Carrot Cake Whoopie Pies 6 2018

Bake 6-8 minutes until set and golden.  Allow to cool for a few minutes.

Carrot Cake Whoopie Pies 10 2018

While these are baking prepare the cream cheese frosting.  I chose to use neufchatel cheese which has a 1/3 less fat.  I know, a funny time to start worrying about calories but what can you do?

In a large bowl add 8oz/226g of the cheese and 56g/1/2 stick of butter (both at room temperature).

Carrot Cake Whoopie Pies 7 2018

Using a hand mixer cream the two ingredients together for a few minutes.

Carrot Cake Whoopie Pies 8 2018

Add 187g/1 1/2 cups of confectioner’s (powdered) sugar and 1/2 teaspoon of vanilla extract.  Mix well until the frosting is smooth and light.

Carrot Cake Whoopie Pies 9 2018

Pair up the mini cakes so both sides are relatively equal in size.  Spread the frosting on one side and add the other to make a sandwich.

Carrot Cake Whoopie Pies 11 2018

Keep the ones you don’t eat right away in the fridge.  Not going to lie, these were really good.  With the carrot how unhealthy can these be?  Ahem.  😉

Do’s Cake and Family Traditions

Does tradition make things taste better?  Not sure with this cake as it’s so delicious but it is very much tied into childhood memories.  It was a cake my mum would make for birthday parties and special occasions and it wouldn’t last long at all.  It’s really the family cake.

My mum got the recipe from our Aunt Do, who is married to our Uncle Bob.  They’ve been married for over 65 years and they are literally the sweetest people you would ever meet.  Do got the recipe decades ago, from a neighbour she thinks.  A recipe from the mists of time!  My sister did say she saw something similar in an old Fanny Farmer book called Mix in the Pan cake.  Could be a variation on that.

This is a very easy cake to make and the cake itself is vegan and the icing could be made vegan without too much trouble.

Preheat the oven at 350F/175C.

In a large mixing bowl sift together 3 cups flour, 2 cups sugar, 2/3 cups baking cocoa, 2tsp baking soda and 1 tsp of salt.  Flatten the mixture and put 3 large holes in it.

Do's cake 1 2018

In one hole pour 2 tsp of vanilla, in another put another 2 tsp vanilla, then spread between the three holes a cup of vegetable oil.  The oil might not fit into the three holes and it will spread out, that’s ok.  With a spoon or spatula mix it all together.

Do's cake 2 2018

Next add 2 cups of cold water gradually while mixing until smooth.

Do's cake 3 2018

In a lightly greased 13″ x 9″ pan, pour the cake batter into the pan and bake for about 30 minutes until a toothpick comes out clean.

While the cake is baking make the frosting.  In a small saucepan add 2 1/2  tablespoons flour and 1/2 cup milk.  Cook on medium low heat until the flour and milk thickens.  Whisk continually while it cooks.

Do's cake 6 2018

Let it cool.  In a medium bowl add 1/2 cup of granulated sugar, 1/2 cup of butter and 1 tsp of vanilla.  Add the cooled flour milk mixture.  If you want this vegan use vegetable shortening and a milk alternative like almond milk.

Do's cake 7 2018

Using an electric hand mixer, beat on med high until it is light and fluffy, about 5 minutes.

Do's cake 8 2018

Add any food colouring and beat for another minute or so.  Spread on the cake.

Do's cake 9 2018

I tried, quickly, to do a shamrock as a design.  If you squint you might be able to see it!

Do's cake 10 2018

This is so good that it will definitely continue as a family tradition.  I probably should ask Aunt Do if she has any other recipes to pass down!  😉

Chocolate Strawberry Cupcakes with Chambord White Chocolate Ganache

Winter is back though fortunately not with the vengeance that was predicted.  At least in our area.  It was predicted we’d get 8-14in/20-35cm.  While it is still snowing we’ll only get a third of that.  Which is fine by us!

Chocolate strawberry cupcakes 2 2018

This was our view yesterday and I felt it was a good time to bake.  The kids had early release from school in anticipation of the impending storm.  Turns out the storm took it’s time to start and they could have gotten a whole day in.

Our daughter had won a kit for a strawberry chocolate cupcake mix which she made for a class in school.  This sparked an idea for me to use real strawberries and to really make it posh I thought I’d make chambord white chocolate ganache.

Chocolate strawberry cupcakes 1 2018

I made the cupcakes using this chocolate cake recipe.

Chocolate strawberry cupcakes 3 2018

While the cupcakes were baking I made up the ganache.  I adjusted the white chocolate ganache I made previously as I didn’t need a lot.  I used 1/2 cup/4oz of cream, 1 tablespoon/1/2oz of butter and 4oz of white chocolate.  When the cream and butter were heating up I added 3 tablespoons of chambord for flavour.

Chocolate strawberry cupcakes 4 2018

For the chocolate frosting I found an Allrecipes recipe.  I had to alter it a bit as I didn’t have enough baking cocoa.  So I cut the confectioner’s sugar to 2 1/2 cups rather than 2 3/4 cups as I had to use hot cocoa for the baking cocoa.  The sugar high from these cupcakes was quite something!

Chocolate strawberry cupcakes 5 2018

Once all the ingredients are made it’s time to assemble. Cut a pyramid out of the cupcakes and insert the strawberry upside down and liberally drizzle the ganache over and around the strawberry.

Chocolate strawberry cupcakes 6 2018

Cut the tip off the pyramid and put the top back on the cupcake and frost the top of the cupcake.

Chocolate strawberry cupcakes 7 2018

The cupcake absorbs the ganache and makes it incredibly moist and flavourful.  The strawberry is the only healthy bit of this sweet!