Making Whoopie…Carrot Cake Pies That Is

The amount of chocolate our kids still have from Christmas is going to keep them going for quite awhile.  They would disagree completely with me, of course.  As scrooge like as I was being in the chocolate department I didn’t want to forego any treats.  I’m not that mean!

So what do bunnies really like?  Carrots!

Carrot Cake Whoopie Pies 1 2018

I did a search on Pinterest for fun easter desserts.  The plethora of Peeps desserts was a bit scary.  Aside from the fact none of us like Peeps, my kids aren’t little so something less sugar high inducing would do the trick.  I found this Mini Carrot Cake Whoopie Pies recipe and I thought it would be fun to make.  Not to mention easy!  And as we’re still plugging away at our renovation of the bathroom project, well, easy is key.

I will say the overall time to make this of 18 minutes is seriously over optimistic.  Give yourself an hour.  There is only so fast I can go!

Preheat the oven to 350F/175C

Begin with finely grating 180g of carrot.  This will give you 1 1/2 to 2 cups of shredded carrot.

Carrot Cake Whoopie Pies 2 2018

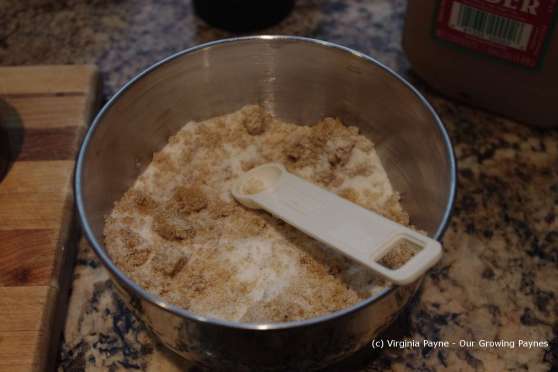
In a mixer add 113g/1 stick of butter (room temperature) along with 100g/1/2 cup of packed light brown sugar and 100g/1/2 cup of white sugar.

Carrot Cake Whoopie Pies 3 2018

Cream all this together for several minutes until creamy and blended well.  While this is mixing mix the dry ingredients together in a medium sized bowl.  Add 250g/2 cups all purpose flour, 1 1/2 teaspoons of baking soda, 1 teaspoon of baking powder, 1 teaspoon of cinnamon, 1 teaspoon of ground ginger, 1/2 teaspoon of ground nutmeg and 1/2 teaspoon of salt.

Carrot Cake Whoopie Pies 4 2018

Gradually add the dry ingredients to the mixer.  Once all the ingredients are mixed well add the grated carrot.

Carrot Cake Whoopie Pies 5 2018

Using a piping bag and a large nozzle pipe out the batter into circles about an inch/2.5cm onto parchment paper.  This is very sticky and they come out like wizard hats.  Don’t worry about that, it will smooth out in the oven.  Just tap down the real pointy peaks.

Carrot Cake Whoopie Pies 6 2018

Bake 6-8 minutes until set and golden.  Allow to cool for a few minutes.

Carrot Cake Whoopie Pies 10 2018

While these are baking prepare the cream cheese frosting.  I chose to use neufchatel cheese which has a 1/3 less fat.  I know, a funny time to start worrying about calories but what can you do?

In a large bowl add 8oz/226g of the cheese and 56g/1/2 stick of butter (both at room temperature).

Carrot Cake Whoopie Pies 7 2018

Using a hand mixer cream the two ingredients together for a few minutes.

Carrot Cake Whoopie Pies 8 2018

Add 187g/1 1/2 cups of confectioner’s (powdered) sugar and 1/2 teaspoon of vanilla extract.  Mix well until the frosting is smooth and light.

Carrot Cake Whoopie Pies 9 2018

Pair up the mini cakes so both sides are relatively equal in size.  Spread the frosting on one side and add the other to make a sandwich.

Carrot Cake Whoopie Pies 11 2018

Keep the ones you don’t eat right away in the fridge.  Not going to lie, these were really good.  With the carrot how unhealthy can these be?  Ahem.  😉

Bakewell Tart and Delicious Traditions

Another season down and on to feeding the creative side of my brain!  I managed to end the tax season in my typical fashion of coming down with a really bad cold.  So much for hitting the ground running.  I am finally catching up with everything.  Unfortunately bills and things have to have a higher priority than blogging.  Boo.

Part of my inspiration this year for blogging is to bake or cook dishes that have a bit of family tradition.  I place a great deal of value on having a connection with the past as we go forward with the new generations.  I don’t like history forgotten.

A few weeks ago I asked my dad what treats his mum cooked or baked when he was growing up.  My Grandma is someone I’d love to go back in time and spend a day baking with.  She was incredibly smart and the ultimate multi-tasker.  I sometimes think she would read, watch telly, and do the cross word at the same time because her brain needed the high end exercise.  She passed away when I was very young but I have wonderful memories of her.

My dad responded with a list of things she would make like amazing homemade bread, sponge cake, and bramley apple pies.  She would also make bakewell tarts.  As this has been on my list for awhile I thought that would be a great place to start.

The recipe I used was from the Baking with Mary Berry baking book my sister gave me for my birthday.  It is actually pretty straight forward.

Preheat the oven to 400F/200C.

In a mixing bowl add 1 1/2 cups of flour and 6 tablespoons of cold butter.  You will see this is not for the faint of heart when it comes to butter!

Bakewell tart 1 2016

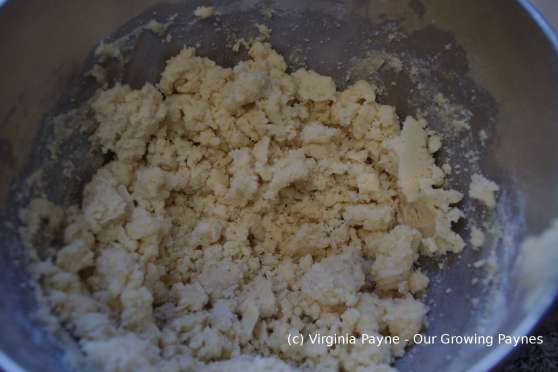
Using a pastry fork blend the butter and flour until well blended.  You want it to look like small bread crumbs.  I found it weird that no salt was in the recipe.  It wasn’t too bad but next time I make it I would add about 1/4 tsp of salt.

Bakewell tart 2 2016

The next step is to add a bit of cold water at a time until the pastry comes together.  This part is hard to explain as you don’t want it too dry or too wet.  So keep adding until is just comes together.  This step always brings me back to when my dad taught me how to make pastry.  He learned from my Grandma.  I was an adult when he taught me but it was still fun standing side by side learning from him.

Wrap the pastry in cling film and chill for 30 minutes.

In a saucepan, melt 9 tablespoons (see what I mean?) and add 1/2 cup of sugar.  Cook for a minute or so.  Remove from the heat and let cool for a few minutes.

Bakewell tart 5 2016

A one large egg, beaten, 3/4 cup of rice flour, and 1/2 tsp of almond extract.  Mix well.

Bakewell tart 6 2016

Set aside.  Grease a tart pan that has a loose bottom.  The recipe called for 7 1/2in/19cm diameter pan.  I don’t have one of those but I have a rectangle one roughly the same area size.  Roll out the pastry and lightly press into the pan.

Bakewell tart 4 2015

Trim the excess and set aside.  Spread raspberry jam on the bottom of the pastry.  I kept it a bit too thin this time round but I will put more in.

Bakewell tart 7 2016

Pour in the filling and then cut the excess pastry in to strips and place them in a criss cross pattern.  Brush with milk.

Bakewell tart 8 2016

Bake for about 45-50 minutes until golden brown and the filling is set.

Bakewell tart 9 2016

If you would like dust it with icing sugar.

Bakewell tart 10 2016

This isn’t overly complicated and is worth the effort to make.  The almond and raspberry flavours are a great pairing.  I hope I did my Grandma proud.  🙂

Jerk Chicken and What Kind of World

Tragedy brings out the best and the worst of us.  And it was true to form this past weekend.  After the attacks in Paris I, like millions of others, added the French flag to our profile pic on Facebook.  But I also quickly, like many, realised the hypocrisy of not speaking out against the terror in Beirut and many other countries.

And that’s when it started getting ugly.  When you combine fear with bigotry some seriously hateful things start getting posted.  It saddens me no end we have a serious humanitarian situation and we have people running for president saying we should only accept Christians.  Never mind that this isn’t a Christian nation as laid out in the Treaty of Tripoli which said this was a secular nation.  And it was ratified by 100% of the senate of the time.  That concept is being lost to the mists of time.  The West has a lot of responsibility of the vacuum that keeps being created in the Middle East but yet a lot would wash their hands of the crisis.  A situation where you have children so scared they put their hands up in fear because they think the journalist cameras are guns.

I am well aware there aren’t any easy solutions laying about.  But I do wish the powers that be would start thinking of the ramifications before they keep repeating history.  I mean how many times do we put people in power to only have to forcibly remove them.  Or how many times do we change the governments or boundaries without fully understanding the region.

Because not only do I want peace and not have people living in fear, I would love to be able to not have to figure out how to explain to my kids how much humanity is still getting it wrong.

While all this was going on we were preparing for my husband’s birthday party.  The theme?  A pirate murder mystery night.  There was a lot of planning for this as I had to assign characters for our guests and get the packets ready for each person so they knew what their objectives were for the murder and investigation.

One of our friends had great fun with doing themed food of cannon balls, shark teeth, etc.  She also did a great Minecraft themed party for her son a few weeks ago.  This is definitely up her alley.

One of the dishes I made was jerk chicken.  A great time to try using our dried habaneros.  I also used some dried cayenne.  Sinuses would be cleared for miles around.

Jerk chicken 1 2015

The recipe I used as a guide was from food.com and I followed it for the most part.  I didn’t have bay leaves but I’m not a fan of that ingredient.  I didn’t have any dried thyme either.  But I have to say the ingredients weren’t missed.

In a spice grinder, finely grind 3 habaneros and 2 cayenne peppers that have been dried.  Add that to a medium sized bowl.  Then grind rosemary and allspice so you have about a tablespoon of each.  Again add that to the bowl.  Add a tablespoon of ground ginger and a tablespoon and a half of sea salt.  Next you will need 1 1/2 teaspoons each of onion powder, black pepper, and ground cinnamon.  Add 3/4 teaspoon of each of ground nutmeg and paprika.  Finish with 1/3 cup sugar, a juice of a lime, and 1/3 cup of olive oil.

Jerk chicken 2 2015

Mix well and add about a pound and a half of chicken that you have cubed.  Make sure the chicken is well coated.  Then remember not to touch your eyes.  Ahem.  Even after washing your hands.

Jerk chicken 3 2015

Let this marinate for a couple of hours.  I chose to grill this on the stove top.  But given the potency of the hot peppers I should have done this outside.  It was like I pepper sprayed the kitchen!  What a way to welcome guests.

Jerk chicken 4 2015

I did want to do a mango dipping sauce but the mango I bought refused to ripen so it was just the chicken.

Jerk chicken 5 2015

This was a hit.  Fortunately our friends could handle the heat.  Because, while the flavours were balanced, this is not for the weak of heart.


Black Currant Blueberry Jam and Up Against the House

House 1 me 0.  Actually the score is probably more skewed than that if we look at the entire time I’ve lived here.  But this week I am definitely on the losing end!  And it’s all my fault.  Which is really annoying.

It’s time to redo the front porch so we began the project this past Sunday.  Parts of the old boards were being very stubborn in coming loose.  I tried pounding them up with a crow bar.  Really not the thing to do.  I reinjured my injury from the fall in January.  Each day I’ve brought the computer in bed with me in hopes I could sit up long enough to do a blog post.  Finally I can do it today.  Cooking this week has been pretty basic as well.  But I’m properly on the mend so I can blog!  Plus we need to do more on the porch this weekend.  I have a cunning plan as they say to not screw my back up again.  I feel optimistic.

I made this jam a couple of weeks ago and talked about it on the radio show.  I was inspired by a jam I had in France.  And we had a bumper crop of black currants so I had to do something with them all!  We froze quite a bit for later crumbles.  I wanted a jam that wasn’t overly sweet so I could easily use it for savory dishes as well.

Black currant jam 1 2015

I like to keep my jams on the rustic side, it’s less fussy that way.  In a saucepan put in equal amounts of black currants and blueberries.

Black currant jam 2 2015

On medium low heat bring the berries to a simmer.  Once enough liquid has been released from the berries turn up the heat a bit to continue a high simmer.  To start I added 1/2 cup of white sugar and incorporated it into the berries.  Then I added 1/2 a cup of brown sugar.  The tricky bit with black currants is that they are very tart.  But you don’t want to add so much sugar that the jam becomes stiff.  To offset this I added maple syrup.  Add a bit of a time until the jam has thickened.

Black currant jam 3 2015

Sorry about the quality of that pic!  Couldn’t use a tripod at this step!  Remove from the heat and can the jam.  I served this with homemade crusty bread and stinky French cheese.  The creaminess of the cheese balanced well with the tart jam.

Black currant jam 4 2015

Fingers crossed the porch doesn’t defeat me tomorrow!

Lemon Cookies with Strawberry Mint Ginger Jam

Stateside we just had our Labor Day Weekend.  The last hurrah of summer.  Best thing about it?  We had the kids!  Saturday was gorgeous so we took advantage of it and spent most of it outside.  Our daughter is trying out for the school’s soccer team and she wanted to practice her shooting.  Off we traipsed to play a bit of footie at the local playground.  Nearly did a split trying to get the ball!  Not a good thing.  Still it was a blast running round with the kids.

And the holiday weekend is never complete without our annual trek to the go-carts.  But dang it if I didn’t get the slow car again!  It was like a Sunday drive.  I want a car with oomph!

The weekend was topped off with marathon sessions of Settler’s of Catan.  That game is seriously addicting.

I came across a delicious recipe for lemon cookies with strawberry jam that looked super easy.  And if you are going to have marathon sessions of games with the kids there needs to be treats available!

First I made the jam.  I usually do the jam with ginger but I wanted to add another layer of flavour.  We have a ton of mint in our garden and I thought it would give a nice balance to this cookie.

Strawberry cookies 1 2014

In a small sauce pan add about 1 1/2 cup of chopped strawberries, 2T of lemon juice, and a small handful of mint.  Grate fresh ginger over the strawberries to your taste and bring to a simmer.

Strawberry cookies 3 2014

Remove from the heat once it gets to the jam consistency.  Set aside to cool.

Preheat the oven to 350F/175C

For the cookie dough you will need:

1 cup butter

2/3 cup sugar

zest of 1 lemon

Strawberry cookies 4 2014

Cream the butter and sugar together and add the lemon zest.

Strawberry cookies 5 2014

Add the flour and mix well.  If the butter is cold like mine was because I spaced on getting the butter out of the freezer in time you may find it crumbly but that is ok.  The cookies may not spread out as much as warmer butter but it will still be delicious!

Strawberry cookies 6 2014

Roll the dough into 1 inch balls.  Use a finger to make dents into the dough and fill with a small amount of strawberry jam.  Bake for 9-11 minutes.

While it is baking mix up a glaze of 1 cup powdered sugar, 1/2 tsp almond extract, and 2T of milk.  Mix with a whisk.  If it is still too thick add more milk.

When the cookies are still warm drizzle the glaze over the cookie.

Strawberry cookies 7 2014

Not only these really easy to make they are fabulously delicious!  And it was a great way to use up some leftover strawberries.


The “OMG I want the recipe!” Apple Cider Caramels

I work with a woman that brings in treats whenever we have a tax class.  Which is fabulous as she can bake!  Once she brought in these little apple cider caramels for us.  I kid you not, the reaction around the room as each person tried them was OMG!  So I asked her for the recipe and she said she found it on the blog Smitten Kitchen so off I went and did the search and found the recipe for apple cider caramels.  I finally had a chance to make them recently and not surprisingly they were a big hit.  These caramels have a wonderful burst of apple cider flavour.

As her recipe recommends, it is important to prep all the ingredients by the time the cider is ready as once the cider is reduced you need to get it all done at once.  This is not a hard recipe to do but you just need to pay attention.

Line a 13×9 inch pan with parchment paper.  It needs to go up all four sides.

In a 3-4 quart pan pour in 4 cups of apple cider (not the alcoholic kind!) and bring to a boil.

Apple cider caramels 1 2013

This needs to be reduced down to about 1/2 a cup.  No less than 1/3 a cup.  This took me about 45 minutes or so.  In the meantime I gathered the rest of my ingredients.  In a small dish I mixed 1/2 tsp of ground cinnamon and 2 tsp of sea salt.  Her recipe calls for flaky sea salt which I didn’t have so I ground mine a bit.

Apple cider caramels 2 2013

In a larger bowl mix together a cup of sugar and 1/2 cup of brown sugar.  I also set aside the 8 tablespoons of butter cut up into small chunks.

Apple cider caramels 3 2013

Once the cider is reduced it should look like this.

Apple cider caramels 4 2013

Stir in the butter, the sugars and 1/3 cup heavy cream.

Apple cider caramels 5 2013 Apple cider caramels 7 2013 Apple cider caramels 8 2013

Once it is thoroughly mixed put it back onto the heat and bring it to 252F/122C.  This will take about 5 minutes.

Apple cider caramels 10 2013 Apple cider caramels 11 2013

Remove immediately from the heat and stir in the cinnamon mixture.

Apple cider caramels 12 2013

Pour into the pan and spread out evenly.

Apple cider caramels 13 2013

I let it cool down a bit before putting it into the fridge to set completely as that is a lot of heat to throw into the fridge.  This part takes a couple of hours for it to fully set.  Once it is set remove from the fridge and pan and place on a cutting board.  Her recipe says to use neutral oil on the knife.  I didn’t have any so I used a very sharp knife to press down.  I also put some wax paper over the top so I could hold it down with my hand.  If the caramel got to soft I popped it back in the fridge for a few minutes to harden.  That way it didn’t stick to the knife so much.

Apple cider caramels 14 2013

I then individually wrapped each piece in wax paper.  3-4″ square should do the trick.

Apple cider caramels 15 2013

They did not last long!  🙂

English Pickled Onions

Holy moly this month is just zipping by.  I am flat out with Christmas stuff and work.  I miss blogging regularly! So I’m grabbing a few minutes with a quick one.  🙂

My husband and I are fans of the pickled onion and they are very easy to make, just a little time consuming.  When my dad tried these it brought him right back to when he was young in England at his local.  You know when the local was still a local?  Hard to find these days!  I got this recipe from the BBC of all places.  I was surprised they post recipes but I’m glad they did as these really work.

You need to start the day before with peeling the onions.  I buy three kinds, white, red, and yellow.  pickled onions 1 2012

My least favourite bit is the peeling!  I cry every time.  I do wear the fashionable onion goggles.  🙂  Use only fresh firm onions.

pickled onions 2 2012

Once they are all peeled then they need to be salted.  Just enough to lightly coat the onions.

pickled onions 3 2012

Cover the bowl with cling film and set aside overnight.  In the morning rinse and then drain to dry.  While these are drying I start sterilizing the jars.  The size jars I have for this are 1/2 pint and I usually get enough onions to fill 7 of them.  To sterilize the jars I boil them for 10 minutes.  The vinegar mixture I use is a liter of malt vinegar, 6 oz of sugar, and several shakes of red pepper flakes.  Heat this in a saucepan and bring to a boil

pickled onions 4 2012

I let this simmer as I am packing the onions into the jars.  It’s important the sugar is dissolved.  While packing the jars I put the rings and lids for the cans in the hot water to sterilize further.  I do not boil at this point so I don’t ruin the lids.

pickled onions 5 2012

Carefully pour the vinegar mix over the onions.  Fill to just below the top.  Place the lids and rings on and tightened the jars.  This recipe does not need to be processed like jam or stock.  Just put in a dark cool spot.  They will be ready in two weeks.

pickled onions 6 2012

These are great as snacks and are wonderful with a cheese plate or a ploughman’s lunch.