Mushroom Leek Pie

I’ve been on a bit of a vegetarian kick lately when I’ve been looking for new recipes. I came across a Mushroom Leek Pie with a creamy gravy, though Attachment Mummy’s recipe was vegan. I’ve no problem, obviously, with vegan dishes but I’m not a fan of dairy substitutes so I decided to go just with vegetarian for this dish. And since the hill towns in our area saw snow this week, comfort food is all the range round here!

We did manage to start to get some plants in that won’t do well in frost. I may have been tempting fate but we’ll see. We’re going to have a bed for edible flowers and then a bed for cut flowers. Any suggestions for what to plant would be greatly appreciated. Hopefully, if all goes well this summer there will be some recipes inspired by the edible flower bed.

Technique for Mushroom Leek Pie

Chop up all the ingredients. Melt the butter in a saucepan and sauté the garlic and mushrooms.

Depending on how much butter the mushrooms soak up, you may need to add more butter when it comes time to make the roux. They can be quite the sponges!

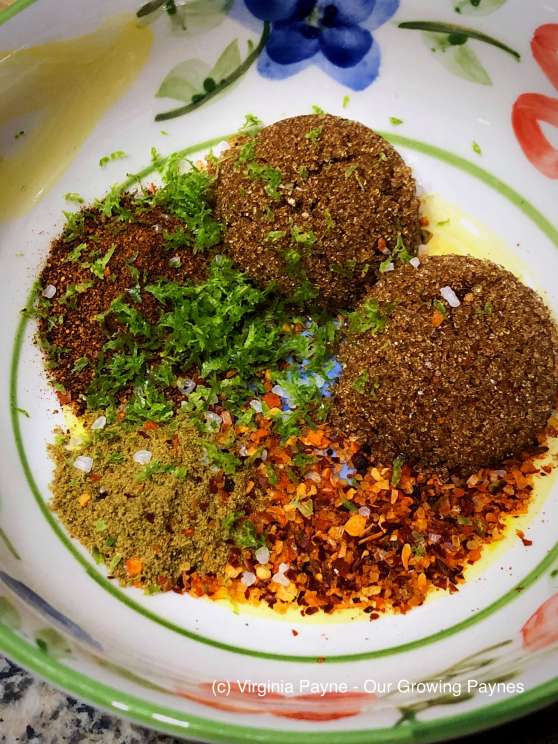
When the mushrooms start to brown add the oregano and leeks. Sauté for a couple of minutes. Then add the flour and mustard.

I like my gravies in pies to be thick so I added the 1/3 cup of flour. If you don’t like it overly thick go with a 1/4 cup. The mixture will get thick and a bit stiff. Stir while cooking for a few minutes then add the white wine. Season with sea salt and pepper. Add the milk and bring to a boil while stirring. You don’t want a roiling boil and keep an eye as it can boil over quickly if you aren’t paying attention. Add the parmesan cheese.

Taste and adjust the flavours as needed. You want to make sure the mustard and oregano come through the milk. Make up the pastry and roll out thinly. Spoon the mushroom and leek mixture into ramekins. Cover with the pastry. Use a knife to pierce the top and brush milk all over.

Bake at 400F/200C until the pastry is flaky and golden brown.

Serve immediately. If you save some of this for another day, go with the 1/4 cup flour as it does get even thicker as leftovers.

Mushroom Leek Pie

A creamy pie with a lovely flaky crust.

Course Main Course
Cuisine American
Keyword Mushroom Leek Pie
Prep Time 15 minutes
Cook Time 30 minutes
Servings 4 people
Author Our Growing Paynes

Ingredients

Pastry

  • 1/2 cup all purpose flour 70g
  • 1/4 cup butter
  • 1/8 tsp salt
  • 2 tbsp cold water

Mushroom Leek Filling

  • 4 tbsp butter
  • 3-5 cloves of garlic, finely chopped
  • 4-8 mushrooms (depending on size), sliced
  • 1 cup chopped leek
  • 1 tbsp chopped fresh oregano
  • sea salt and freshly ground pepper to taste
  • 1/3 cup flour
  • 2 tbsp stone ground mustard
  • 1/2 cup dry white wine 4oz
  • 2 cups milk 16oz
  • 1/3 cup freshly grated parmesan cheese

Instructions

Pastry

  1. Using a pastry fork or fingers, blend the butter, salt and flour until the mixture resembles small breadcrumbs.

  2. Add the water bit by bit to the mixture, using your fingers to incorporate the water into the pastry. You may need more than 2 tbsp but add water until the dough comes together.

  3. Roll out thinly and using a cookie cutter, cut to the size you need.

Mushroom Leek Filling

  1. Melt the butter in a saucepan. Sauté the garlic and mushrooms until the mushrooms start to brown. Add the leeks and oregano. Cook for a few minutes.

  2. Add the flour and mustard. Stir while it cooks for a few minutes so the flour is cooked thoroughly.

  3. Add the white wine then season with sea salt and pepper. Add the milk and bring to a boil. Don't have it a rapid boil or it will boil over. To finish add the parmesan cheese.

Constructing the pie

  1. Fill four ramekins with the filling. Top with the cut pastry. Use a knife to put slits in the pastry and then brush the pastry with milk.

  2. Bake at 400F/200C until the pastry is golden and flaky.

Mexican Stuffed Sweet Potato

I’ve discovered, in our local co-op, a sweet potato called Hannah Sweet Potato (sometimes called a yam) which has a lovely flavour without being overly earthy like the normal sweet potato. I found a recipe for Mexican Stuffed Sweet Potato by Simply Quinoa that looked interesting. Something easily adaptable to what I had on hand.

I was struck, as I made this while watching the rain come down for weeks on end, how lucky we are to have readily available ingredients. If we have a bad season in the garden it isn’t make or break. I’ve been watching Wartime Farm on YouTube which is a documentary about what the farmers had to go through in the UK during WWII. The historians living as they did in the ’40’s struggled with the wet weather. During wartime it would be catastrophic. If you like history and/or homesteading, it’s a fascinating 8 part series.

I do wonder how many people would thrive or survive in those conditions now. We live in a time of buying one use items, fast food, fast fashion etc. I do hope the trend of getting back to basics continues. There are a lot of skills that shouldn’t be lost.

Technique for Mexican Stuffed Sweet Potato

Here is my version of this dish based on what we had and what we like. But that’s the beauty of this dish, very versatile.

Roast the sweet potatoes and cook the quinoa according to the directions. Rinse the black beans and drain. Chop the veg. Heat up the olive oil in a skillet.

Start by sautéing the garlic, scallions and mushrooms.

Add the beans and corn. Cook for several minutes as the corn is frozen when tossed in. Add the spices and lime juice.

Near the end of cooking add the pepper. I always add the pepper so it just cooks but still stays crunchy. I really don’t like mushy peppers.

Once the sweet potatoes are cooked through cut them in half. Combine the quinoa, tomatoes and veg together. Spoon over the potatoes and sprinkle shredded cheese over the top. Add a dollop of sour cream and serve.

It’s a very inexpensive, very filling and very tasty meal.

Mexican Stuffed Sweet Potato

An inexpensive flavourful vegetarian meal.

Course Main Course
Cuisine Mexican
Keyword Mexican Stuffed Sweet Potato
Prep Time 10 minutes
Cook Time 45 minutes
Servings 4
Author Our Growing Paynes

Ingredients

  • 2 Hannah sweet potatoes
  • 1/2 cup quinoa
  • 2 tbsp olive oil
  • 2 scallions, chopped
  • 3 cloves garlic, coarsely chopped
  • 2-3 cremini mushrooms, coarsely chopped
  • 1/2 cup black beans, drained and cooked
  • 3/4 cup frozen corn
  • 1-2 tbsp chili powder
  • 1-2 tsp ground cumin
  • 1 tbsp lime juice
  • 1 tbsp habanero flakes optional
  • sea salt and pepper to taste
  • 1 tbsp fresh chopped cilantro
  • 1 tomato, coarsely chopped
  • shredded cheese
  • sour cream to top

Instructions

  1. Bake the sweet potato at 400F/200C in the oven until tender. Cook the quinoa according to instructions on the packet.

  2. Heat the olive oil in a skillet. Sautè the garlic, mushrooms and scallions for a couple of minutes.

  3. Add the beans and corn along with the spices, lime juice and cilantro. Cook for several minutes then add the pepper.

  4. Once the potatoes are cooked, slice them in half. Combine the veg, quinoa and tomato then spoon over the potato halves. Top with shredded cheese and sour cream. Serve while hot.

Tabouli Salad and Resolutions

We’ve forgotten what the sun looks like in our area. Mother Nature has taken the April Showers bit very seriously, enough to continue into May. Really hope there will be a plethora of flowers soon! Even though the weather calls for a lot of comfort food, sometimes bright light food lets me pretend it’s a lovely spring. Tabouli Salad fits the bill with the fresh ingredients and flavour.

I’m not one for resolutions. We all know how long they can last, we’re lucky if it’s the end of January. But after several years of working on my mental health, injuries, etc, it was time to work on the physical stuff and lose the weight I gained from meds I was on. A big key was doing food bowls with various healthy choices to mix and match so I wouldn’t get bored. Tabouli salad is a great addition to this.

For this version I went heavy on the bulger wheat as some of the ingredients are quite strong and if I was going to be in a small cubicle with clients I couldn’t have dragon breath. I mean, dragons are cool if you are in Games of Thrones but not when you want clients to come back. The recipe will reflect the usual balance rather than what is shown in the photos.

Technique for Tabouli Salad

The bulger wheat needs to be prepped first. You can either boil the wheat for 12-15 minutes or add boiling water to the wheat, cover and let steam for 45 minutes. I tried both ways and they work but the steaming gives it a better texture.

Add the wheat to a bowl and add boiling water until it’s about 1/2in/1.5cm above the wheat. Cover with a tea towel and let steam for about 45 minutes or until all the water is absorbed.

While the wheat is steaming prep the fresh ingredients. I used parsley, tomatoes, cucumber, mint and scallions. You can add other ingredients such as celery or garlic. For the tomatoes discard the seed pulp. Chop all the ingredients into small bits. Mix the dressing and toss the ingredients and set aside until the wheat is ready.


Rinse the bulger wheat with cold water and drain. Toss with the other ingredients. It’s ready to serve but when not serving keep it covered and chilled in the fridge.

I enjoyed it with a soft boiled egg and smoked salad. Brain food!

Tabouli Salad

A fresh flavourful salad is a great choice for dinner or food bowls.

Course Salad
Cuisine Mediterranean
Keyword Tabouli Salad
Prep Time 10 minutes
Cook Time 45 minutes
Total Time 55 minutes
Servings 8
Author Our Growing Paynes

Ingredients

Bulger Wheat

  • 1 cup bulger wheat, coarse
  • Boiling water, enough to cover wheat

Salad Ingredients

  • 1 cup chopped parsley
  • 3 roma tomatoes
  • 1 cup chopped cucumber
  • 2 scallions, chopped
  • 1/4 cup chopped fresh mint

Dressing

  • 1/4 cup lemon juice
  • 1/3 cup olive oil
  • sea salt
  • fresh ground pepper

Instructions

Bulger Wheat

  1. Boil water.  Pour over the wheat until it’s covered by about 1/2in/1.5cm.  Cover with a tea towel and let stand for 45 minutes or until the water has been absorbed.  Rinse with cold water and drain.

Fresh Ingredients and Dressing

  1. Mix the fresh ingredients and dressing together.  Set aside until the wheat is cooked and drained.  Toss everything together.  It is ready to serve.  Store in the fridge covered.  

Chicken Corden Bleu Mac and Cheese

It’s official, our daughter has chosen where she is going to university, deposits paid, and so begins the journey. We’re excited for her but will miss her very much. It’s time though, she’s ready to fly. Now that tax season is over we’ll be going over any gaps in her knowledge with recipes, budgeting, etc. She actually is pretty good with this stuff but she has a list of things she wants to make sure she knows. Trust me, we are not sending our kids out into the world without knowing how to write a check or do laundry.

A big thing as she heads out into the world is knowing how to cook cheap and delicious meals. The kids had mentioned an idea of Chicken Corden Bleu Mac and Cheese that they were playing round with at the other house which would fit the bill. As it is a cool and rainy spring, we’re still in the comfort food season which makes this meal perfect.

Making the Chicken Corden Bleu Mac and Cheese

This can definitely be made on the cheap. Use chicken thighs instead of breast, lemon juice instead of white wine, etc.

Marinate the chicken a few hours beforehand. Whisk the ingredients together and add the chicken. Cover and chill in the fridge.

Grill the chicken until just cooked. It will then be cooked more in a skillet and oven so you don’t want to end up with rubbery chicken. It’s bad enough as a strange toy but awful when eating! I discovered I was out of propane for the grill so inside it was. We use our cast iron griddle constantly. Pity it’s so heavy!

While making the sauce cook up the pasta. Melt the butter and add the onion. Cook until they start to become translucent. Add the garlic and mustard. Bring to a simmer, careful not to let it catch. Add the flour and whisk thoroughly. Cook for a few minutes while whisking, Then add the remaining marinade, wine and milk. Keep stirring until it comes to a boil but don’t boil over! With milk it can happen in a blink which creates quite a mess.

In goes the cheese, chicken (cubed) and ham. Simmer until the cheese has melted and you have a creamy thick mixture.

Pour into the baking pan with the pasta and mix well. Top with panko bread crumbs.

Bake until the top is nice and golden.

It is ready to serve as soon as it is out of the oven. We did carb overload with fresh baked bread my husband made. It’s so good with butter! It went quickly as I found when I went to have some for lunch and it was all gone!

Chicken Corden Bleu Mac and Cheese

Comfort food with a twist.  Grilled chicken with corden bleu flavours.

Course Main Course
Cuisine American
Keyword Chicken Corden Bleu Mac and Cheese
Prep Time 20 minutes
Cook Time 45 minutes
Total Time 1 hour 5 minutes
Servings 8
Author Our Growing Paynes

Ingredients

Marinade and Chicken

  • 1 lb chicken breast 16oz/454g
  • 3 tbsp olive oil
  • 2 tbsp dry white wine
  • 1 tbsp brown mustard
  • 3-4 cloves garlic, finely chopped
  • sea salt and pepper to taste

Mac and Cheese

  • 4 tbsp butter
  • 1/2 large onion, coarsely chopped
  • 3 cloves of garlic, finely chopped
  • 1-2 tbsp brown mustard
  • sea salt and pepper to taste
  • 1/4 cup flour
  • 1/2 cup dry white wine 4oz
  • 2 cups milk 16oz
  • 2 cups shredded jarlsberg cheese
  • 3-5 slices ham, chopped
  • 1 lb pasta
  • Panko Bread crumbs to cover top

Instructions

Marinade and Chicken

  1. Whisk the ingredients together.  Slice the chicken breasts in half lengthwise.  Coat and cover the chicken with the marinade and chill in the fridge for a few hours. 

  2. When it’s time to make the dish, grill the chicken until just done.  Cube and set aside.

Mac and Cheese

  1. Pre heat the oven to 350F/175C

  2. Cook the pasta

  3. In a saucepan, melt the butter.  Add the onions and cook until translucent.  Add the garlic, mustard and sea salt and pepper.  Cook for a few minutes then add the flour to create the roux.  Cook additional few minutes.  Add the remaining marinade, wine and milk.  Bring to a boil then reduce the heat to a simmer.  Add the cheese and stir until melted.  Next add the chicken and ham.  

  4. Add the pasta and sauce to a baking dish.  Top with the panko bread crumbs. 

  5. Bake until the bread crumbs are golden.  Then serve.  

Spiced Candied Bacon

The inspiration for Spiced Candied Bacon struck as we were on a little escape to see Mumford and Sons in Providence, Rhode Island. I was at a loss of what to blog about this week as the show was this past Wednesday night, the night I usually cook something up for my blog. The bar at the hotel came to the rescue! We ordered a charcuterie plate that had some candied bacon. It was so good with a hint of spiciness. I just had to make it.

For my husband’s birthday, our kids bought him a ticket to Mumford and Sons. The band is amazing live. Great harmonies, fantastic music and they just interact with the audience really well. A fabulous break from the dull winter.

Technique for Spiced Candied Bacon

Mix the dry rub ingredients together. For this recipe I used 2 tablespoons of brown sugar but if you want it less sweet, you can reduce the sugar by up to a tablespoon. Or increase the spices. You just need to make sure you have enough rub for the bacon.

Evenly coat the bacon and then bake on convection/fan. Keep an eye on this as you don’t want it suddenly to get overly crispy. It takes 5-10 minutes depending on the thickness. Set aside when done.

As it’s probably not a good idea, though they wouldn’t protest, to just feed your kids bacon I made a southwest veg topping with panko crusted chicken and pepper jack cheesy potato and parsnip mash. I cooked up corn, mushrooms, onion, garlic and pepper with a bit of chicken stock, habenero flakes, lime zest, chili powder and cumin.

Layer the mash, chicken, veg and the bacon and serve. I’ll definitely be making this bacon again. It’s so easy to do and would go with so many different kinds of dishes. Thank goodness for inspiration!

Spiced Candied Bacon

A quick and easy recipe balancing heat and sweet for entrees and starters.  

Course Appetizer
Cuisine Southwest
Keyword Spiced Candied Bacon
Cook Time 10 minutes
Servings 4
Author Our Growing Paynes

Ingredients

  • 8 Streaky bacon rashers
  • 2 tbsp brown sugar
  • 2 tsp chili powder
  • 1/2 tsp ground cumin
  • zest from half a lime
  • sea salt to taste
  • 1 tsp habanero flakes

Instructions

  1. Preheat the oven on convection/fan to 350F/175C.

  2. Mix the dry ingredients well then coat the bacon rashers.  Lay out the bacon on a metal cooling rack and place that onto a baking rack.  Bake for 5-10 minutes, keeping an eye on it so it doesn’t crisp up too much.  

  3. Serve with entrees or starters, or by itself!

Blood Orange Jaffa Cakes

Unlike these Blood Orange Jaffa Cakes I made, blogging consistently the first few months of the year doesn’t seem to be my jam! With the craziness of tax season and the inevitable germ fest I get caught up in, life just gets nutty and I always seem behind. I realised it had gotten bad when I had only managed one journal entry for this month in my bullet journal.

I had this past Sunday off and it was time for grooving to good music and bake in the kitchen. It was a beautiful sunny day and it was wonderful to take a break from the stress and just enjoy myself. On deck was the Fruit Cake that my husband loves. But I wanted to make another treat for him. He loves Jaffa Cakes and it’s one the of treats his mum packs when she visits. I get the McCoys and he gets Jaffa Cakes, it’s lovely! His mum had clipped a recipe for Jaffa Cakes from the iNews paper for us. I made a few adjustments to the recipe because I wanted to use blood oranges and it calls for 40g of butter, which is great except it said to set aside 30ml for the recipe and use the remainder for greasing the muffin tin. There wasn’t any extra butter so I used spray oil.

Technique for Blood Orange Jaffa Cakes:

This is not a difficult recipe to make but it is time consuming so it’s a perfect weekend bake.

The Jelly:

Such a gorgeous red.

Squeeze the two oranges and set aside. Combine the water, sugar and orange peel in a saucepan.

Bring to a boil and then simmer until the liquid has reduced about 50%. This will take 10 or 15 minutes.

Strain the mixture into a bowl.

Add the gelatin powder and stir until fully incorporated. Make sure the syrup is still quite warm. I found it cooled off too quickly and didn’t incorporate fully. It still worked but at the end the centre was more set than the edges. So make sure you can keep it warm enough.

Pour then orange juice into the syrup and mix well.

Line a 18cm/8in square pan with cling film and strain the mixture into the pan.

Chill in the fridge for at least two hours so it sets properly.

Baking the cake:

Preheat the oven to 375F/190C.

Brown the butter in a small saucepan.

This part can be tricky. The butter can quickly go from a golden colour to full on brown. Don’t panic, as long as it doesn’t taste burnt and keeps the toasted, nutty flavour. Let the butter cool while getting the other ingredients together.

Sift the sugar and flour together.

Using a whisk, incorporate the almond flour and orange zest into the flour and sugar.

Lightly beat the egg whites. Add that along with the salt and butter. Mix well with the whisk.

Spoon the batter into a 12 hole muffin tin that has been lightly greased. Bake 9-12 minutes until golden round the edges and is springy to the touch. Cool completely before turning the cakes out.

Place the jelly with the cling film on the counter and using a 4cm/1 1/2in cookie cutter. Place the cut jelly onto the centre of each cake.

Melt the chocolate and spoon it over the top of the cakes.

Let the chocolate set and enjoy! The only bad thing about this recipe is that it only makes 12 cakes!

Blood Orange Jaffa Cakes

A traditional recipe with a twist.  

Course Dessert
Cuisine English
Keyword Blood Orange Jaffa Cakes
Prep Time 2 hours
Cook Time 12 minutes
Total Time 2 hours 12 minutes
Servings 12
Author Our Growing Paynes

Ingredients

Blood Orange Jelly

  • 60 grams caster sugar
  • 120 ml water
  • orange zest from 1 blood orange
  • 1 packet powdered gelatine
  • 100 ml blood orange juice

Cake

  • 40 grams browned butter
  • 60 grams icing/powdered sugar
  • 20 grams all purpose flour
  • 40 grams ground almonds or almond flour
  • orange zest from 1 blood orange
  • 2 egg whites, lightly beaten
  • a pinch of salt

Chocolate to top the cake

  • 120 grams dark or semi-sweet chocolate

Instructions

Blood Orange Jelly

  1. Bring the water, sugar and orange zest to a boil.  Simmer until the liquid has reduced 50%.  Takes about 10-15 minutes.  

  2. Strain the syrup into a bowl and add the gelatine.  Mix until dissolved.  Add the blood orange juice.  Line a 18cm/8 in square pan with cling film.  Strain the mixture into the pan.  Chill for 2 hours.  

Making the cake

  1. Preheat the oven 190C/375F.

    Grease a 12 hole muffin tin.

  2. Brown the butter and let cool.

  3. Sift the sugar and flour together.  Whisk in the almond flour and orange zest. Add the egg whites, salt and browned butter.  Using the whisk, incorporate the ingredients well.  

  4. Spoon the batter evenly between the 12 muffin holes.

  5. Bake 9-12 minutes until the edges are golden and the sponge is springy to the touch.  Allow to cool completely before turning out of the muffin tin.

Assembling the Blood Orange Jaffa Cakes

  1. Using the 4cm/1 1/2in cookie cutter, cut out the jelly and place on the cakes. Melt the chocolate and spoon over the cakes.  Let set and serve.  

Cider Sage Pork

Just like any food blogger that has been doing this for several years, I find inspiration and motivation for new recipes ebbs and flows. I love it when it flows, no surprise there but when life gets crazy the brain cramping definitely increases. When the imagination is sparking I make lists but sometimes ideas show themselves when you aren’t paying attention.

I was in the queue waiting to pay for my weekly food shop and I spied a magazine with a pork dish on the cover. The title for it said Cider Sage Pork. If the magazine wasn’t $10 then it would have left the rack and been perused. But it stayed. I figured I could come up with my own recipe and keep the $10!

Sweet apple is lovely with garlic and sage

We’re lucky that our co-op carries delicious sweet apples like gala or pink lady. First thing is to prepare the marinade so the pork loin can marinate for several hours. If you don’t have the time, try to marinate for at least an hour. Give the pork a chance to take on the lovely flavours. The cider I used was apple cranberry as there was a special on and I’d thought it would be fun to add the tang of cranberry to this dish. But obviously regular cider works. I should also note, the cider is non-acoholic, not the hard cider.


When it is time to cook dinner, finely chop the apple, onion, garlic and sage. Set aside. Pre-heat the oven to 350F/175C. In a skillet, heat up the olive oil and brown all sides of the pork loin.

Finish off the pork in the oven while making the sauce. Add the onion, garlic and apple to the skillet. Cook for several minutes until the onion starts to become translucent.

Add the remaining marinade and chicken stock. Bring to a simmer and add the mustard, sage and thyme. Season with sea salt and pepper.

Simmer the sauce to reduce by a third. When the pork is cooked, remove from the oven and let is rest for 8-10 minutes.

To serve, slice the pork loin and top with the sauce. To keep the dish light we had roasted potatoes and corn as sides.

I was very happy to find this inspiration while patiently waiting in a queue. I’m definitely keeping my eyes open!

Cider Sage Pork

A flavourful pork loin with apple cider, onion, and sage.  

Course Main Course
Cuisine American
Keyword Cider Sage Pork
Prep Time 15 minutes
Cook Time 25 minutes
Total Time 40 minutes
Servings 2
Author Our Growing Paynes

Ingredients

  • 1 pork loin (about a pound/16oz

Marinade

  • 3 tbsp olive oil
  • 1/2 cup apple cranberry cider 4oz
  • 1 clove garlic, finely chopped
  • 1 tsp fresh thyme
  • 2 tsp fresh sage, finely chopped
  • sea salt and pepper to taste

Sauce

  • 2 tbsp olive oil (used to brown the pork)
  • 1/2 cup thinly sliced onion
  • 1 apple, chopped
  • 2-3 cloves of garlic, finely chopped
  • 1/2 cup chicken stock 4oz
  • marinade used for the pork
  • 2 tbsp brown mustard
  • 1 tsp fresh thyme
  • 1-2 tsp fresh sage, chopped
  • sea salt and pepper to taste

Instructions

Marinade

  1. Mix the ingredients together and marinate the pork for several hours in the fridge.  If you are pressed for time, marinate for at least an hour.  

Pork Loin

  1. Preheat the oven to 350F/175C.  Heat the olive oil in a skillet and brown all sides of the pork and finish cooking in the oven.  Once cooked, rest for 8-10 minutes before slicing.

Sauce

  1. In the skillet with the olive oil used to cook the pork, add the onion, garlic and apple over medium heat.  Cook until the onion starts to become translucent.  Add the marinade and chicken stock and bring to a simmer.  Add the sage, thyme and mustard.  Season with sea salt and pepper. Simmer until the sauce reduces by a third.  

Serving

  1. Slice the pork and top with the sauce.  

Beetroot Raita

Happy New Year everyone! Here’s to a great year. I always try to start out positive as you never know what is going to be thrown at you. At the very least, start on a high note! After the bustle of the holidays it’s time to reconnect and get back to sharing good food. I’m starting with an easy and healthy side dish given that people’s resolve to be healthy is still going strong 4 days into the year. Beetroot Raita fits that bill. It’s an easy dish to compliment those spicy curries.

Technique for the Beetroot Raita.

The red of this beetroot is absolutely stunning.

Some may choose to roast the beetroot, which is perfectly fine. I chose to boil the beetroot to cook. I peeled and coarsely chopped the beetroot into small pieces before cooking. It will cook faster that way.

Mix the spices together and toss the cooled beetroot into the mixture until the beetroot is evenly coated.

Add the plain yoghurt and stir well. Chill in the fridge until you are ready to serve.

It’s a pity that the beetroot couldn’t keep it’s colour. It does work as a nice counterbalance to the heat of the curry and we do love our spicy curry!

Beetroot Raita

An easy accompaniment to spicy curries with beetroot and yoghurt.  

Course Side Dish
Cuisine Indian
Keyword Beetroot Raita
Prep Time 15 minutes
Cook Time 20 minutes
Total Time 35 minutes
Author Our Growing Paynes

Ingredients

  • 1 cup peeled and coarsely chopped beetroot
  • 4-6 oz plain yoghurt
  • 1 tbsp freshly grated ginger
  • 1 tsp ground cumin
  • 1/4 tsp asafoetida
  • 1 tsp ground chili
  • 1 tbsp fresh cilantro, torn
  • 2 tsp lime juice
  • sea salt
  • freshly ground pepper

Instructions

  1. Boil the peeled and chopped beetroot until tender.  Just make sure you don’t let it get mushy.  You want the beetroot to hold its shape.  Drain and rinse with cold water to stop the cooking.

  2. In a small bowl add the spices and juice together.  Toss the beetroot in the spices until well coated.  

  3. Mix in the plain yoghurt.  Chill in the fridge until ready to serve.  

Apple Brie Chicken

“Out of the mouth of babes” is a very apt phrase.  Obviously it’s important to listen to your children.  Aside from the fact it’s healthy for them and can be a lot of fun for all, you never know when they will be a source of inspiration.  

One of my son’s chores is to help me walk the dogs.  It’s my favourite “task” to have him do as it means one on one time with him.  I get to listen about his day, find out how things are going for him, etc.  We also, surprise, surprise talk about food.  He mentioned trying a frozen stuffed chicken with apples and brie/camembert.  Ooh, I said, that sounds really good.  It promptly went on my list of thing to make.

Technique for Apple Brie Chicken:

This is a quick easy meal to put together with breaded chicken and a mushroom garlic sauce.

Sweet apples with brie is a lovely flavour combo.

Preheat the oven to 375F/190C.

Slice pockets into the chicken breasts and fill with the apple and brie.

Coat the chicken with beaten egg and dredge in panko bread crumbs.  Heat the olive oil in a large skillet.  Brown the chicken on all sides.

Finish cooking the chicken in the oven.  In the same skillet add the mushrooms.  Sauté for a few minutes before adding the garlic and rosemary.

Add the butter and wine and simmer for a few minutes.  Once the chicken is finished cooking serve with the mushroom sauce spooned over the chicken.

I served this with corn and roasted potatoes.  See, it does pay to listen to the kids. 🙂  

Apple Brie Chicken

A quick meal with apple and brie. 

Course Main Course
Cuisine American
Keyword Apple Brie Chicken
Prep Time 10 minutes
Cook Time 15 minutes
Total Time 25 minutes
Servings 4 people
Author Our Growing Paynes

Ingredients

Chicken

  • 2 boneless chicken breasts
  • 6 slices brie or camembert
  • 1 apple, sliced
  • 1 egg, beaten
  • 1 cup Panko bread crumbs
  • 2 tbsp olive oil

Mushroom Garlic Sauce

  • 1 cup sliced mushrooms
  • 3-5 cloves garlic, coarsely chopped
  • 1 tbsp chopped rosemary
  • 1/3 cup dry white wine 3oz
  • 1 tbsp butter

Instructions

Chicken

  1. Preheat the oven to 375F/190C.

    Slice pockets into the chicken and stuff with the brie and apple.  Dredge in the beaten egg and Panko bread crumbs.  Heat the olive oil in a skillet.  Brown all sides of the chicken and finish cooking in the oven.

Mushroom Garlic Sauce

  1. Sauté the mushrooms in the olive oil in the skillet for a few minutes.  Add the garlic and rosemary.  Cook for a few more minutes.  Add the wine and butter. Simmer for a minute or two.  

Serving

  1. Slice the chicken and spoon the sauce over the chicken and serve.  

Cheesy Pasta with Pan Seared Filet of Beef

I’ve been in a definite comfort food mood this week, what with winter settling in and the holiday season having started.  Now that Thanksgiving has passed I’m well into the Christmas mood.  We had the perfect day this past weekend to find our tree.  Just above freezing with gorgeous blue skies.  Our daughter will be heading off to university next year so the traditions are a bit poignant this year. She just got her first notice of acceptance to the University of Manchester and we are very proud.  We just need to hear from all the ones she applied to then we’ll know where she ends up being.  It is an exciting time but it will be good to have it all sorted.

I did a rummage through our freezer and found a filet of beef that was the perfect size for my husband and I.  I’m getting ready for a craft fair this weekend so I needed an easy meal to make.  I came up with a cheesy pasta to go along with the pan seared filet of beef.

Technique for Creamy Pasta and Pan Seared Filet of Beef:

Cooking the Beef:

Preheat the oven to 350F/175C.

Melt the butter in a hot skillet.  Season the beef and brown on all sides.

Cook in the oven until it is the desired doneness.  We prefer it medium rare on the rare side.  Cover and let the meat rest.

The Pasta and Sauce:

Prepare the pasta according to instructions.

In the same skillet used for the beef, sauté the onions, mushrooms and garlic.

Once the mushrooms begin to brown add the brandy and the beef stock.  I took a page from Conor Bofin and had reduced my beef stock and created “ice” cubes out of them.  Certainly does save space.  Bring the sauce to a simmer.

Add the rosemary and cream.  Once that is heated through add the grated cheese.

Add the pasta.  Slice the steak and grate a bit more cheese over the dish and serve.

Perfect for when you need a fix of comfort food.  Makes getting snow a lot easier!


Cheese Pasta with Pan Seared Filet of Beef

An easy and flavourful comfort food with cheese and filet of beef.

Course Main Course
Cuisine American
Prep Time 15 minutes
Cook Time 10 minutes
Total Time 25 minutes
Servings 2
Author Our Growing Paynes

Ingredients

  • 8 oz Filet of Beef
  • 3 tbsp butter
  • 1 1/2 cup pasta, cooked
  • 1/2 cup chopped onion
  • 1 cup sliced mushrooms
  • 3-5 cloves of garlic, coarsely chopped
  • 1 tbsp brandy
  • 1/2 cup beef stock 4oz
  • 1/3 cup heavy/double cream 3oz
  • 2 tsp chopped rosemary
  • 1 cup equal part cheddar and jarlsberg
  • pinch sea salt
  • pinch freshly ground pepper

Instructions

Cooking the Beef

  1. Preheat the oven to 350F/175C.

    Melt the butter in a skillet.  Season the beef with sea salt and pepper.  Brown all sides of the beef.  Finish cooking in the oven until desired doneness.  Cover and rest before slicing.

Pasta Sauce

  1. In the same skillet you pan seared the beef sauté the mushrooms, onions and garlic.  Once the mushrooms start to brown add the brandy, rosemary and beef stock.  Simmer for a few minutes then add the cream.  Once it is heated through add the cheese.  Add the cooked pasta once the cheese is melted.  Stir well.

Putting it together

  1. Serve the pasta and sauce onto the plate.  Slice the beef and place on top of the pasta and grate fresh cheese over the dish.