Leeks and Onions

The other day I had the grand plan of recreating a dish I had in Paris.  It was an unmitigated disaster.  The key ingredient was the artichoke.  I had never prepared one before and I may never again.  The dish was a lovely tender bottom half of an artichoke with amazing smoked salmon, a poached egg, and a mustard sauce.  The last three I was able to do.  However we now have a pot that is blackened and I’ll have to attack that with oven cleaner.  I hope that works.  I was steaming the artichoke and it ran out of water.  Sigh.

So I moved on to other things.  I decided it was time to get the leeks and onions into the ground.  We like to rotate our little crops each year and that was the plan for the leeks and onions.  Mother Nature had other plans as one bunching onion plant is regrowing and some seeds that didn’t sprout last year are coming up now.  Which is pretty cool but that bed is staying the same as last year.

Leeks and Onions 1 2013

For the leeks I dig out two small trenches to plant them in and mix in organic compost and fertilizer.  A lot of gardeners will bury the leek as it grows to blanch it.  I only do that a little bit until the leeks are pretty sturdy as I like the dark green.  More flavour.

Leeks and onions 2 2013

I plant them carefully and they are so delicate at this point.  Hard to believe they can get up to 5 feet long and you can use them as bats.  🙂

The bunching onions are much easier.  After mixing in the compost I just plug them in willy nilly.  I left space to plant more seeds in a few weeks to stagger the harvest.

Leeks and onions 3 2013

Our garden is well on it’s way now with the bulbs and flowers starting to grow.  The peas are poking through and I think spring is finally here to stay!

Planting Potatoes

We had heard over the years how wonderful fresh harvested potatoes were so last year we decided to give it a try.  We did pretty well up to the point tiny little bugs stripped the leaves.  Those little buggers eat really fast.  We did get a small harvest and they were delicious.  So this year we’ll be ready for the little twerps.

The potatoes being planted are Red Norland and German Butterball.  Because our plot isn’t big we needed a way to grow them without taking up a lot of space.  I found last year on Pinterest loads of information about potato towers and that seemed perfect for us.  And it worked very well.  They aren’t hard to grow but there is a bit of prep to do before planting them.

Planting potatoes 1 2013

The seed potatoes get shipped mid April to our area.  We get our stuff from High Mowing in Vermont.  They are great but I do recommend buying your seed from an organic source near your zone.  That way you know it is adapted for your growing conditions.  The potatoes need to be sliced so each chunk you have has some “eyes” on it.  This is where the potato plants grow from.

Planting potatoes 2 2013

The cut sides need to be treated with sulfur to prevent rot.  Now last year we were very careful to follow directions.  They had to dry completely before planting.  But then the next direction was to put them in the soil and water well.  What’s the point?  So this year I cut them all up and treated them.  I let them be in the sun while I put the towers together.

Planting potatoes 3 2013

As the potatoes grow more soil is added so you need enough height to accommodate the growth.  It is also good to have composted soil for this as the potatoes need lots of nutrients.  We had some old wire fencing so we use these for the forms of the towers.  Line the bottom with the compost and line the sides with straw.  Fill the tower with about 6 inches of soil, water well then place the potatoes in with the eyes pointing upwards.

Planting Potatoes 4 2013

Cover with a couple inches of soil and water well.

Planting Potatoes 5 2013

A friend gave us two small tower bags to try out so we used those and built a second tower.  We should get loads of potatoes without using a ton of space.  🙂

Planting Potatoes 6 2013

Finally warm enough to plant! But the wind…..

It seems like we live on sea cliffs this year with the wind we’ve had to contend with.  We’re an hour and a half from the ocean but not that you’d notice.   I enjoy a nice breeze but there are days when it’s strong and constant.  It doesn’t help us keep warm with the wind chill.  I had Saturday off but the wind chill kept me in.  I love gardening but not when I’m shivering and turning blue!  Sunday I had to work but it was gorgeous out even with the high winds.  So I was very excited when we got out early!  Time to plant!  🙂

I had to pin everything down as I worked so I wouldn’t be running round the garden catching things and I had to duck my head as the dirt swirled but it was wonderful to be outside and digging in the dirt.

Every year we try to rotate the crops in our raised beds so this year the broccoli and Brussel Sprouts will be near the door.

First planting 1 2013

It’s important to plant the seedlings properly so they thrive.  It can be a shock being transplanted.  Though these seedlings are in the hardy category it still makes sense to give them a great start.  I dig a hole big enough for the seedlings and put in organic plant food and fill the hole with water.

First planting 2 2013 First planting 3 2013

Place the plant in the hole and fill it up.  If the dirt is really dry water as you do this.  This will help the plants from going into shock.  Gently tamp down the dirt so the plant is in snugly.  Don’t compact too much though as you don’t want to destroy the ecosystem in the soil.

First planting 4 2013

Water thoroughly.  In this bed I also planted my son’s cabbage from school.  It’s a program for third graders to learn about gardening.  I think it’s a fabulous idea for kids.  In September kids can submit photos to win a contest.  🙂

First planting 5 2013

First planting 6 2013

I had time to plant the peas so I took advantage of the weather and got it done.  I love planting peas.  They are so amazing right off the vine and they are a great plant for the garden as they fix the nitrogen into the soil for the next crop.

First the seeds have to be inoculated.  Looks icky but it works.  I soak the seeds while I prep the bed.

First planting 7 2013

The seeds need to be planted in troughs as you want to gradually add dirt to the roots as the plants come up to keep them cool.  For a plant that has such delicate flowers they really love the cool weather.

First planting 8 2013

We moved over the “trellis” from last year.  They are getting a bit beat up so we may have to come up with a new plan next year.  We’ll see how they work this year.

First planting 9 2013

The seeds can be planted an inch apart down the row.  They can handle being planted close together.

First planting 10 2013

Water the seeds and cover with about an inch of soil and then water again.

First planting 11 2013

Then keep fingers crossed that the rabbits don’t get them.  We had a big problem with 3 rabbits last year.  Spent quite a bit of time chasing them off.  They ate a few plants so I had to plant new ones.  So far no issues this week but if they do then there is a product we get for organic gardening that has dried blood.  Gross but effective.  Certainly gets our dogs attention.

The Green Stuff is Growing!

This is our third year of doing seedlings and each year we have different problems.  This year’s problem is everything in the middle of the seedlings dries out and the seeds grow around the outside of the planter.  We’ll have to problem solve for next year.  Fortunately we still have enough to transplant and we should have a decent crop this year.  Though I was hoping for more tomato plants but we’ll see how that goes.

transplants 1 2013

Celery can be tricky.   I have fussed with this for four years now.  The first year we bought seedlings and they did quite well.  The next year I did seedlings and more than half died as I planted them.  We got a few that were wonderful.  Last year we did much better but these little guys, until well established, will die if you look at them wrong.   I was hopeful this year as I planted more than half a tray but we ran into the middle of the tray drying out frequently.  I hope to have 12 to transplant.  Fingers crossed.  Because fresh celery in soups is fabulous!

transplants 5 2013

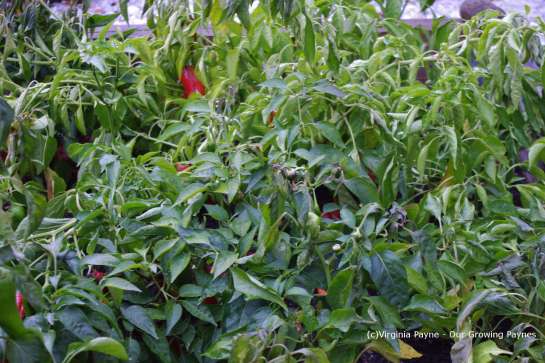
Peppers are doing well for the most part.  We should have a bumper crop again this year.  We were overwhelmed last year but fortunately the community kitchen takes fresh produce and we could freeze some.  We have two sweet peppers and several hot peppers.  Great for hot pepper jelly!  Love that on cheddar.

transplants 4 2013

Our green house is officially open now.  I think.  We thought so a few weeks ago then winter came back and we had to pull everything back in.  Can you believe these leeks can get to be 5 feet long?!?  The seeds are so tiny!

transplants 3 2013 transplants 2 2013

We’ve been lucky so far with the pak choi.  These were transplanted earlier and so far so good.  Though we may need to risk it and transplant again.  We’re on the fence.  I’ll be direct seeding soon as well.

This weekend is supposed to be gorgeous and definitely springlike next week so it is time to get a few veg in!  So excited.  🙂

The bulbs are coming, the bulbs are coming!

Spring is in sight.  The depths of winter are losing their grasp with the warmer days.  We had a gorgeous day this past Sunday.  Warm sun was winning the battle against the snow.  I was pottering about with opening the greenhouse and doing transplanting when I noticed that our garden was waking up.

Spring bulbs 1 2013

I was so excited to see the bulbs coming up!

Spring Bulbs 2 2013

I did a bit of weeding but the ground is still very squishy so it was awkward crouching down to weed.  Don’t want to compact the soil!

Spring bulbs 3 2013

In this little plot we planted tulips, daffodils, and crocuses.

Spring Bulbs 4 2013

Won’t be long now before more of the garden will start stirring.  Of course the rest of the snow needs to melt. 🙂


My 100th Post and a Big Thank You!

Can’t believe it, my 100th post!  It has been so much fun so far getting to know new people and sharing our blogs with each other.  It has proven to be a great creative outlet for me.  So I want to thank everyone for their support and kind comments.  I look forward to the next 100 and meeting more fellow bloggers.

But as a thank you I like to give flowers so here are a few pictures from my garden that I took last year.  A bit of a break from the winter if you will.  🙂

100th post 3 2013 100th post 4 2013 100th post 5 2013 100th post 2 2013 100th post 1 2013

Thanks again everyone.  🙂

And so it begins with transplanting…..

Given that we just got dumped on by a ton of snow, there are probably several of us who would love to see some green.  This is partly why I am so anxious to start our plants in January!  We planted a few different plants a couple of weeks ago and I showed the seed planting then.  While a few are starting to pop up the broccoli and Brussels Sprouts are going like gangbusters!

seedlings 1 2013

I couldn’t believe how well they are doing.  It’s great because we’ll have very healthy plants to put in the ground come April when the ground is workable.  As we did have a major storm and I realised my bigger pots are in the carriage house I had to make do with smaller 6 packs for now.  I carefully spooned out each seedling and put them each into their own cell.  Watering as I went so they don’t go into shock.

seedlings 2 2013

They will lay down and act like they’ve given up sometimes but they perk up.  I put the clear cover over them and back onto the heating pads and under the grow lights.  So now every one-two weeks we’ll be transplanting and staging the seedlings until it’s time to put them out in the real world….

First seedlings of the year…

For me planning the garden makes the winter more bearable.  It’s snowing right now, not a big storm, but it’s not spring.  So a few weeks ago my husband and I figured out what we needed for seeds this year and got them on order.  It’s like Christmas in January when they come! 🙂

We learned quite a bit last year on what works and what doesn’t for seedlings so hopefully this year we will do really well.  I think we’ve sorted out which seeds need to start now and then to stagger the rest.  We planted our peppers, leeks, bunching onions, broccoli, and Brussels Sprouts.

planting seeds 2 2013

To start we brought out all our trays we had from last year.  Thank goodness they are reusable!  I fill the tray part way with organic seed starter and then water.  I use a spray bottle so there is an even spread of moisture.  You don’t want mud.

planting seeds 3 2013

I don’t want the drier soil to wick away moisture from the seeds.  Then furrows are “drawn” in the soil and the seeds are dropped in.  I try to match the spacing on the package as much as I can.  We’re limited for space in our setup so I want as much to come up as possible.

planting seeds 5 2013

Once the seeds are dropped in they get sprayed again.  Then the soil gets pressed down over them lightly.  Spray again!  Our house is quite dry in the winter time so it’s important that the seeds get the right environment.

planting seeds 6 2013

Pop the clear lid over the tray.  These are great for keeping the moisture and warmth in.

We set up a spot in the back room with grow lights and heating pads.  We learned the hard way last year that the heating pads should be on timers.  Our house runs 55-60F/13-18C and some seeds require soil temps of about 75F/24F.  So we bought heating pads that said they would raise the temps 10-20 degrees.  Perfect we thought.  Until the soil temp shot up to 110F/43C.  Great way to kill seeds!  So there was a false start there.

planting seeds 7 2013

It’s been a week and the broccoli and Brussels Sprouts are coming up!  We also have alfalfa sprouts coming up as well.  🙂

planting seeds 8 2013

Can’t wait for spring!!

First Frost of the Season

Where we live it can get brutally hot and bitter cold.  One year we had a range of -30 F (-34 C) to 110 F (43 C)!  It was a bit much.  So for the gardens we have to expect anything and everything.  Last week we had our first frost of the season and it got chilly, down to 24 F (-4 C).  Which meant we had to protect our tender veg that was still going strong.  And right now that is nearly half our garden.

It was time to tuck a few raised beds in.  When you do this you want to use breathable fabric so the plants get air but the frost doesn’t settle on the leaves and veg.  When the sun starts to hit the plants remove the sheets and blankets.

The plants we tucked in were peas, beans, peppers, and celery.  As it was quite windy we had to use clamps and lots of rocks.

The next morning was a very pretty morning.

We actually still had a few blossoms on our strawberries but the plants are still small so we weren’t overly concerned.

I love how the frost settles on the plants in different patterns.  🙂

I was thrilled to see the peas did well.

We were pushing it a bit with the peppers but most of the plants came through.

And I was equally surprised the celery did ok!  Which is good because we have a lot of it and don’t want it to go to waste.

Alas the growing season is coming to an end.  Soon the frosts will be too frequent and the warm days will be behind us.  It’s been a wonderful summer for the food.

Freezing Peppers

We planted a massive amount of pepper plants this year so we have quite the bumper crop.  I didn’t want the peppers to go to waste as the season winds down.  I did a bit of research this past month on the internet and found that you can just freeze them.  You can either freeze straight out of the garden or blanch them.  I choose the easy way.  🙂

I picked a bunch, washed them, and patted them dry.  I chopped them up into the size I wanted and put on a cookie sheet.

I just love all the colours!  I pop them in the freezer for at least 24 hours.

I then vacuum seal in the portion sizes I need.  This vacuum sealer has paid for itself many times over and it is relatively easy to use.  Needless to say our freezer is getting full!